Tuesday, July 23, 2013

Puffed Millet Peanut Butter Balls

Finished product. One with chocolate, one without. Both delicious.
These guys are freaking delicious. There are no words to really describe how awesome these are. They taste exactly like a Reese's Peanut Butter Cup, but without all the crap. With only 5 ingredients, they are really quick to whip up and enjoy within 20 minutes of starting. It's awesome. 
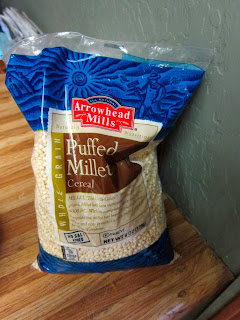
 
Puffed Millet
Peanut Butterrrrr


I made these because we were headed to Phoenix for awhile so that my partner could get costume fitted, as well as learn some choreography for a movie. Yes, a movie! He will be fencing in a movie that a woman is putting on for film school. Since we follow a pretty strict diet, and we were unsure how long we were going to be in Phoenix, I decided to make as many things that could be easily transferred and eaten on the road. These were the perfect little treats, packed full of energy with the millet and the peanut butter

yummy.

Just look at that creamy yummy texture! You do have to chill the "dough" before you try and roll it into balls, but that doesn't take long. 5-10 minutes maybe. And then you roll them up and they are ready to eat, unless you put some chocolate on them, then they need a little more chilling before you dip them. I highly recommend doing a 50/50 mix of chocolate and non-chocolate. At least the first time, and then you'll know which ones you like better.

Puffed Millet Peanut Butter Balls!

I also really enjoyed the lack of clean-up needed making these. I used one bowl (with the exception of the one used for melting chocolate), and they whipped up so fast. As a baker, I know that patience is needed to make some awesome stuff. And I suppose this isn't really "baking," but "making." It was just nice to have a homemade sweet treat so quickly and so mess free. Usually when I bake, things go flying everywhere and I get really messy.


The chocolate dipped ones remind me so much of Reeses PB cups
I really dislike rolling things out. So maybe you have a kid or a partner, or someone who enjoys making balls that are actually bite size. I start off with the best intentions of making bite-sized balls to easily pop in your mouth while driving, but I get so annoyed with rolling things out that I tend to start small and get larger each time. It's kind of like making pancakes--you start off making normal sized pancakes, and then towards the end, you make one GIANT pancake cause you're just over it. Or at least I am, and that's what I do. These balls are exactly the same way. I started off small, but then just go so bored that I made them larger than bite size. At least for me--I have a tiny mouth so it required two or three bites, but my partner just popped them in his mouth with no sweat.
 
Look at that delicious-ness!

Puffed Millet Peanut Butter Balls
Makes 20-32+ balls (depending on size)

2 c. puffed millet
1 c. peanut butter (I used half creamy and half crunchy since that's all I had)
4-6 tbs. agave (depending on how much you want them sweet)
2 tsp. vanilla extract

Chocolate coating:
Handful of dark chocolate
1tbs. coconut oil

Place peanut butter in a microwaveable measuring cup and warm for 45 seconds. Once a bit more creamy and melted, add to bowl with agave and vanilla. Mix thoroughly. Add the puffed millet and stir until millet is coated with peanut butter mixture thoroughly.

Once everything is combined well, roll into bite sized balls. Place on a baking sheet, lined with parchment paper and stick in fridge to set up. About 10 minutes.

If adding chocolate coating, take a handful of dark chocolate chips and the coconut oil and place in a microwave safe bowl. Heat for 1 minute and stir until all the chocolate chips have melted. Pick up the puffed millet peanut butter balls and dip one side in the chocolate, and place back on the parchment paper. Do this for as many chocolate ones you desire. If you want, stick in the fridge, let set up again, and then do another round of dipping of chocolate. Once completed, put in the fridge for another 5-10 minutes, then enjoy!

Keep these refridgerated since the chocolate tends to melt and things start to get mushy when they are left out. I kept mine in a zip loc bag, but feel free to use any airtight container that works best for you.

Monday, July 1, 2013

Gluten-free, vegan, peach pie and crust

The final product! Looks, smells, and tastes delicious!
Gluten-free baking is a tricky, tricky, thing. Flours taste weird, things don't rise like they do with normal all purpose flour, sometimes it is really dense, and sometimes it turns out just right, like this pie and pie crust.

millions of peaches, peaches fo me!
I have been figuring out pie crusts for almost a year. I made a ton of pies last year with fresh pumpkin from our garden, preparing for Thanksgiving and wanting it to be perfect. The pie crust I used was ok. It tasted gluten-free and I didn't really enjoy it. It was a weird consistency and it was so funky. So, I gave pie making a rest until I saw rhubarb at the store and realized I had never had rhubarb, and more specifically, a strawberry rhubarb pie before. So I was set on a mission to create the perfect pie crust for this delicious sounding pie.

dry ingredients for the pie crust. 
The first time I made the pie, I did make a strawberry rhubarb pie. The crust was a bust. I added too much liquid, which made me add more flour to try and balance it out. I ended up having a TON of pie crust, and it came out super thick. I don't really like thick crusts... I would prefer a nice little layer of crust and mostly fillings with my pies. So, while it tasted good, I ended up mostly eating just the filling of the strawberry rhubarb pie. My partner loved it and ate it all.
Finally a good gf, vegan pie crust!
The second time I made a pie, I made it with apricots and the pie crust, after paying more attention, turned out perfect. I didn't make so much and I also made it thin enough that when I held up the pie pan to the light, I could see the light through it. Not like there were holes, but the crust was thin enough that I could see that there was a light on.

peaches cooking down, releasing their delicious juices!
So, of course, I had to make another pie to make it even better. I am really into pies lately. I especially like this pie because, well, it's pretty darn healthy for you. The replacement of coconut sugar is so much better than plain ol' granulated sugar. So my project was a peach pie, because oh my goodness, the peaches look heavenly.

sweet crust drops
This pie crust isn't all that sweet, so I added a little sweet crust drops on top of the pie. This was like what you'd put on top of a crisp. But, it wasn't filled with oats. It was the perfect sweet top to add to the tart strawberry rhubarb filling.

close up of the topping on the pie before baking.
I hope you enjoy this pie crust as much as I do. It really is my new go to pie crust. And it takes minutes to put it together.

Gluten-free, Vegan Pie Crust
Serving: 1 9-inch pie dish

1 1/2 c. brown rice flour
1 tbs. arrow root
3/4 tsp. salt
1 tsp. coconut sugar
1/4 tsp. cinnamon
1/2 c. refined coconut oil, solid
1 1/2 tbs. vanilla extract
3 tbs. agave nectar
6 tbs. water

In a bowl, combine dry ingredients. With the mixer on low, gradually add in coconut oil a tablespoon at a time. Once the mix is crumbly, add in vanilla, coconut nectar and slowly add in water a tablespoon at a time until the dough all comes together and forms a ball.

Remove from bowl and form into a ball shape and flatten into a disk. Oil  bottom of pie plate, place disk into pie plate, using either the heel of your hand or pastry roller, press out into the bottom and sides of the plate; then use your hands to form crust and crimp edges. With a fork poke a few holes in the bottom of the crust. 

Preheat oven to 350°*. Place crust in freezer until it hardens up (usually about 15 minutes).

Bake for 5-6 minutes.

Pie Filling

5-6 peaches
1/4 c. coconut oil (solid)
6 tbs. coconut sugar
1 tbs. vanilla extract
2 tbs. arrowroot
1tbs. water

Place filling ingredients, excluding the arrowroot/water in a pot over medium heat, stirring frequently. After the peaches have cooked down, mixed together the arrowroot and water to form a slurry.

Pour arrowroot/water mixture into the peaches. Keep on the heat and stir until the mixture thickens (you'll be able to feel it, so keep stirring and mak sure it is evently combined and thickened.

Pour into pie crust.

Topping

1/4 c. coconut sugar
1/4 c. brown rice flour
2 tbs. coconut oil

Using a fork, mix together ingredients until they form a crumb like consistence. Place spread out on pie before baking.

Bake pie for 30 minutes. Let cool before placing in fridge. If you don't have enough patience as me, place pie in the freezer to help speed along the setting up of pie.

Enjoy at room temperature, or heated with a dollop of ice cream.

* I baked my pie in our grill (because it was 9.30 IN THE MORNING and it was already over 85 degrees in the house), which is like a conventional oven. Infrared is what they call it I think. I ended up baking it about 10 minutes shorter than I would have in the oven because it started to boil it over. So I just transfered it to the oven in the house and let it heat up the oven and continue to bake for the remainder minutes. I have to admit that I was a little nervous that it would taste like chicken since that's what we grill, but it doesn't. It tastes like peach pie and it is freakin' delicious. 

The oven for the pie. aka. the grill!
Pie siting on the grill