Wednesday, December 4, 2013

Spicy Peanut Soup

Look at that colour!
 
It has been cold here in good ol' Flagstaff. Thursday's high, for example, is going to be a lovely 28 degrees. THE HIGH. 28 DEGREES. COLD! The wind blew hard all day yesterday, so I knew it was blowing in the storm. It's supposed to snow up to seven inches today, so let's hope it doesn't make the roads too messy.

Not a whole lot of ingredients needed, which is AWESOME!
 
Because it is winter time, I make a lot of soups and chili’s. I mostly do the cooking, which is fine, but also means that sometimes I try new things and they don't really work. I am much pickier than my partner, so he'll eat whatever it is regardless (at least so far), while I will just make myself some cereal and pout. It's what I do when things go wrong, and that's ok.

I really dislike peeling potatoes. But it does make a difference to do so.
 
But this soup, right here, is delicious. And it has a big enough kick on it to make your insides and outsides warm. The creamy sweet potatoes and the creamy peanut butter with a splash of spice is so very, very good. My partner is a... spice junkie. He loves his spicy food (ordering double Thai hot when we go out for our weekly Thai food, and then adding the spice tray to it... he loves hot hot hot), so this to me is really spicy, but I always leave out the hot sauce for him to add a little extra.
 
Cut them up small, as they take less time to cook
 
I have an issue with leftovers. Not really an issue, but just a dislike for leftovers.I don't like to eat the same thing over and over again. I tend to eat whatever I make for dinner one or two more times, and then I am done. I am over it. I don't want to eat it ANYMORE. But this soup is really good. Most of the soups and chili's I make I will eat more than twice, but it has to have turned out EXACTLY the way I want it to, or I just don't eat it. :)

Yes, this really is a hot sauce.
 
Ingredients

1 tablespoon vegetable oil or olive oil
2 cups chopped onions
1 teaspoon salt
2 tablespoons peeled and grated fresh ginger (I used ground ginger, and this works fine every time)
1 hot sauce (more if you like the heat!)
4 cups peeled chopped sweet potatoes (about 1 1⁄2 pounds whole)
3 cups water
3 cups tomato juice or Veggie juice--either work fine
1 cup smooth peanut butter

Warm the oil in a covered soup pot on medium heat.

Add the onions, salt and cook, stirring frequently, until the onions are translucent.

Stir in the ginger and hot sauce or hot pepper.

Add the sweet potatoes and water and stir well. Bring to a boil, cover, and simmer until the vegetables are very tender. Add the tomato juice and peanut butter to the pot. Using an immersion blender, purée the soup until smooth.

Add more salt and hot sauce to taste.

Tuesday, July 23, 2013

Puffed Millet Peanut Butter Balls

Finished product. One with chocolate, one without. Both delicious.
These guys are freaking delicious. There are no words to really describe how awesome these are. They taste exactly like a Reese's Peanut Butter Cup, but without all the crap. With only 5 ingredients, they are really quick to whip up and enjoy within 20 minutes of starting. It's awesome. 
 
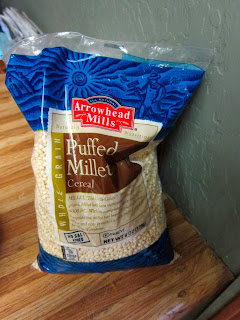
Puffed Millet
Peanut Butterrrrr


I made these because we were headed to Phoenix for awhile so that my partner could get costume fitted, as well as learn some choreography for a movie. Yes, a movie! He will be fencing in a movie that a woman is putting on for film school. Since we follow a pretty strict diet, and we were unsure how long we were going to be in Phoenix, I decided to make as many things that could be easily transferred and eaten on the road. These were the perfect little treats, packed full of energy with the millet and the peanut butter

yummy.

Just look at that creamy yummy texture! You do have to chill the "dough" before you try and roll it into balls, but that doesn't take long. 5-10 minutes maybe. And then you roll them up and they are ready to eat, unless you put some chocolate on them, then they need a little more chilling before you dip them. I highly recommend doing a 50/50 mix of chocolate and non-chocolate. At least the first time, and then you'll know which ones you like better.

Puffed Millet Peanut Butter Balls!

I also really enjoyed the lack of clean-up needed making these. I used one bowl (with the exception of the one used for melting chocolate), and they whipped up so fast. As a baker, I know that patience is needed to make some awesome stuff. And I suppose this isn't really "baking," but "making." It was just nice to have a homemade sweet treat so quickly and so mess free. Usually when I bake, things go flying everywhere and I get really messy.


The chocolate dipped ones remind me so much of Reeses PB cups
I really dislike rolling things out. So maybe you have a kid or a partner, or someone who enjoys making balls that are actually bite size. I start off with the best intentions of making bite-sized balls to easily pop in your mouth while driving, but I get so annoyed with rolling things out that I tend to start small and get larger each time. It's kind of like making pancakes--you start off making normal sized pancakes, and then towards the end, you make one GIANT pancake cause you're just over it. Or at least I am, and that's what I do. These balls are exactly the same way. I started off small, but then just go so bored that I made them larger than bite size. At least for me--I have a tiny mouth so it required two or three bites, but my partner just popped them in his mouth with no sweat.
 
Look at that delicious-ness!

Puffed Millet Peanut Butter Balls
Makes 20-32+ balls (depending on size)

2 c. puffed millet
1 c. peanut butter (I used half creamy and half crunchy since that's all I had)
4-6 tbs. agave (depending on how much you want them sweet)
2 tsp. vanilla extract

Chocolate coating:
Handful of dark chocolate
1tbs. coconut oil

Place peanut butter in a microwaveable measuring cup and warm for 45 seconds. Once a bit more creamy and melted, add to bowl with agave and vanilla. Mix thoroughly. Add the puffed millet and stir until millet is coated with peanut butter mixture thoroughly.

Once everything is combined well, roll into bite sized balls. Place on a baking sheet, lined with parchment paper and stick in fridge to set up. About 10 minutes.

If adding chocolate coating, take a handful of dark chocolate chips and the coconut oil and place in a microwave safe bowl. Heat for 1 minute and stir until all the chocolate chips have melted. Pick up the puffed millet peanut butter balls and dip one side in the chocolate, and place back on the parchment paper. Do this for as many chocolate ones you desire. If you want, stick in the fridge, let set up again, and then do another round of dipping of chocolate. Once completed, put in the fridge for another 5-10 minutes, then enjoy!

Keep these refridgerated since the chocolate tends to melt and things start to get mushy when they are left out. I kept mine in a zip loc bag, but feel free to use any airtight container that works best for you.

Monday, July 1, 2013

Gluten-free, vegan, peach pie and crust

The final product! Looks, smells, and tastes delicious!
Gluten-free baking is a tricky, tricky, thing. Flours taste weird, things don't rise like they do with normal all purpose flour, sometimes it is really dense, and sometimes it turns out just right, like this pie and pie crust.

millions of peaches, peaches fo me!
I have been figuring out pie crusts for almost a year. I made a ton of pies last year with fresh pumpkin from our garden, preparing for Thanksgiving and wanting it to be perfect. The pie crust I used was ok. It tasted gluten-free and I didn't really enjoy it. It was a weird consistency and it was so funky. So, I gave pie making a rest until I saw rhubarb at the store and realized I had never had rhubarb, and more specifically, a strawberry rhubarb pie before. So I was set on a mission to create the perfect pie crust for this delicious sounding pie.

dry ingredients for the pie crust. 
The first time I made the pie, I did make a strawberry rhubarb pie. The crust was a bust. I added too much liquid, which made me add more flour to try and balance it out. I ended up having a TON of pie crust, and it came out super thick. I don't really like thick crusts... I would prefer a nice little layer of crust and mostly fillings with my pies. So, while it tasted good, I ended up mostly eating just the filling of the strawberry rhubarb pie. My partner loved it and ate it all.
Finally a good gf, vegan pie crust!
The second time I made a pie, I made it with apricots and the pie crust, after paying more attention, turned out perfect. I didn't make so much and I also made it thin enough that when I held up the pie pan to the light, I could see the light through it. Not like there were holes, but the crust was thin enough that I could see that there was a light on.

peaches cooking down, releasing their delicious juices!
So, of course, I had to make another pie to make it even better. I am really into pies lately. I especially like this pie because, well, it's pretty darn healthy for you. The replacement of coconut sugar is so much better than plain ol' granulated sugar. So my project was a peach pie, because oh my goodness, the peaches look heavenly.

sweet crust drops
This pie crust isn't all that sweet, so I added a little sweet crust drops on top of the pie. This was like what you'd put on top of a crisp. But, it wasn't filled with oats. It was the perfect sweet top to add to the tart strawberry rhubarb filling.

close up of the topping on the pie before baking.
I hope you enjoy this pie crust as much as I do. It really is my new go to pie crust. And it takes minutes to put it together.

Gluten-free, Vegan Pie Crust
Serving: 1 9-inch pie dish

1 1/2 c. brown rice flour
1 tbs. arrow root
3/4 tsp. salt
1 tsp. coconut sugar
1/4 tsp. cinnamon
1/2 c. refined coconut oil, solid
1 1/2 tbs. vanilla extract
3 tbs. agave nectar
6 tbs. water

In a bowl, combine dry ingredients. With the mixer on low, gradually add in coconut oil a tablespoon at a time. Once the mix is crumbly, add in vanilla, coconut nectar and slowly add in water a tablespoon at a time until the dough all comes together and forms a ball.

Remove from bowl and form into a ball shape and flatten into a disk. Oil  bottom of pie plate, place disk into pie plate, using either the heel of your hand or pastry roller, press out into the bottom and sides of the plate; then use your hands to form crust and crimp edges. With a fork poke a few holes in the bottom of the crust. 

Preheat oven to 350°*. Place crust in freezer until it hardens up (usually about 15 minutes).

Bake for 5-6 minutes.

Pie Filling

5-6 peaches
1/4 c. coconut oil (solid)
6 tbs. coconut sugar
1 tbs. vanilla extract
2 tbs. arrowroot
1tbs. water

Place filling ingredients, excluding the arrowroot/water in a pot over medium heat, stirring frequently. After the peaches have cooked down, mixed together the arrowroot and water to form a slurry.

Pour arrowroot/water mixture into the peaches. Keep on the heat and stir until the mixture thickens (you'll be able to feel it, so keep stirring and mak sure it is evently combined and thickened.

Pour into pie crust.

Topping

1/4 c. coconut sugar
1/4 c. brown rice flour
2 tbs. coconut oil

Using a fork, mix together ingredients until they form a crumb like consistence. Place spread out on pie before baking.

Bake pie for 30 minutes. Let cool before placing in fridge. If you don't have enough patience as me, place pie in the freezer to help speed along the setting up of pie.

Enjoy at room temperature, or heated with a dollop of ice cream.

* I baked my pie in our grill (because it was 9.30 IN THE MORNING and it was already over 85 degrees in the house), which is like a conventional oven. Infrared is what they call it I think. I ended up baking it about 10 minutes shorter than I would have in the oven because it started to boil it over. So I just transfered it to the oven in the house and let it heat up the oven and continue to bake for the remainder minutes. I have to admit that I was a little nervous that it would taste like chicken since that's what we grill, but it doesn't. It tastes like peach pie and it is freakin' delicious. 

The oven for the pie. aka. the grill!
Pie siting on the grill


Tuesday, June 18, 2013

Rainbow Quinoa Salad


Since it is summer and bloody hot in my house, I am finding ways to make a healthy, fulfilling dinner, without using much of the stove top or the oven. It's quite a challenge if you're like me and get tired of eating the same thing over and over again. I can handle eating a salad two or three times a week, but after that, I don't want to see lettuce until the next week. I am like this with everything, and it drives my partner crazy. But, I am picky. And opinionated. And extremely stubborn. So when I started cooking with quinoa more, I thought this would be a great dish and it would include all the colours of the rainbow. 


I love corn. And I love black beans, and I think they are delicious together. Something about corn reminds me of the summer, and I enjoy it so much. It's sweet, crunchy, and delicious. And don't you worry, this is 100% organic corn, so need to worry about GMOs in my food. I don't usually have time to soak beans over night and then cook them when I am ready. Not that I don't have time, let me rephrase that: I don't remember doing this vital step. So I used canned beans, but I do rinse them as well as boil them so that people don't get gassy. Other than that and the quinoa, nothing needs to be cooked. 


Quinoa and I met just recently, and we fell in love. It's such a simple little grain but it is so filling and filled with fiber, something I need very much. And, it cooks just like rice so it doesn't take a long time.


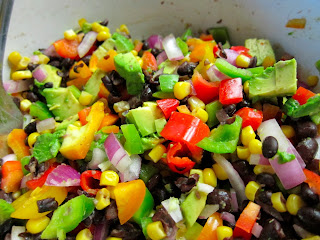
The one thing I really like about this salad is all the colour from all the vegetables. You can add whatever vegetables you want to this mix, but I like the way I have it listed below. It's crisp, sweet, sour, and light. The sauce that goes on this is delicious as well, with the dash of lime and cumin, it adds a nice little summery kick to it.


And I love that I can use a lot of avocados, because they are just so delicious and good for you. 


The sauce is simple: olive oil, cumin, salt and pepper to taste, and lime juice. It's a great summer sauce and adds to the lightness of this salad. I really appreciate that part of this. And the quinoa just soaks it up, which makes a huge difference the next day because the flavours have really mixed together.


This is a great dish to take to a BBQ because it makes so much! I also tend to cook up more quinoa because I like to save some and make a breakfast dish in it the next morning so I get a good, complete breakfast.


Rainbow Quinoa Salad
Serves: A LOT!

2 c. un-cooked quinoa
1 red onion
1/2 each of: green, red, yellow, and orange bell pepper
1 32oz. black beans (the large one, which may not be 32, but not the 15 oz.)
1 15oz. corn kernels
1 container of cherry tomatoes, or any other small tomatoes
1 tbs. vinegar
1-2 avocados (your choice on how much avocado you want. I personally think more is better)

For Sauce:
1/2 c. olive oil
1 container of lime juice
1 tbs. cumin (or more to taste)
salt and pepper to taste

Wash two cups of quinoa thoroughly, removing any sand or dirt crumbles you might find. Bring 4 cups of water to a boil and add quinoa. Bring down to a simmer, place the lid on the pot, and let cook for 20 minutes, undisturbed (much like rice).

Meanwhile, rinse black beans and corn, and also cook in a pot with water for at least 5 minutes (you can not do this as well, but I have noticed that if you don't cook it for just a bit, you and your company may get some gas).

While everything is cooking, chop all the vegetables. I cube the avocado to small pieces so that it goes with the rest of the sizes. Once everything is chopped, place in a LARGE bowl with the tablespoon of vinegar.

Strain the beans and corn and rise with cold water. Add to the bowl with the vegetables. Once quinoa is done cooking, let cool for 20 minutes. Add to vegetable mixture and stir thoroughly, making sure that there are no clumps of quinoa.

Dressing: whisk all ingredients together. Taste and adjust seasoning as you see fit. I like it limey, so if you don't, add more olive oil to tame the lemon juice. I also like mine a bit cumin-y, so the tablespoon isn't too much, but if you want more, add more.

Add the dressing, and stir the salad well. I like mine to cool down before I eat it, as it is more summery that way, so I stick it in the fridge for 15-20 minutes, which also allows all the flavors to combine.

Enjoy!

Tuesday, June 11, 2013

Ginger Snaps


It's been awhile, I know. I could give you all my excuses, sure, but I don't want to. Instead, I will tell you I've been busy gardening and living life. Also, it has been so bloody hot in Flagstaff lately that the thought of turning on the oven is gut wrenching. We have a sunroom, right next to the kitchen, and lately that sun room has been hitting the triple digits, and the house itself is usually in the upper 80's. So, baking and cooking is something I try and keep to a minimum.


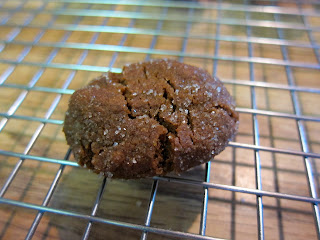
I made these cookies for my April book club meeting. Yes, I know... It's extremely nerdy to be in a book club, but I love books, and I love people who love books. And I love having a night every month where I can hang out with my friends and be nerdy. It's so much fun, and while we are still in the beginning of figuring out how these things work, I am enjoying it immensely. But yes, I have been holding this recipe for almost two months and I don't feel bad about it. And you'll forgive me as soon as you make them yourself. See that molasses colour up there? You know they are going to be delicious.


I think it is essential to always keep dry and wet ingredients separate. I don't think it's a good idea to just combine things in one bowl all at once and hope for the best. That's the thing with baking--it actually is like a chemistry--you have to measure things out perfectly, mix things properly, and keep liquids and dry ingredients separate until it is read to combine them.


These are the perfect cookies to take over to someone's house for tea. They are tender and soft right after you bake them, but they do tend to crisp up as they start really cooling down. Which is great to dip tea in! The tea moistens them all up, and then they just melt in your mouth. They were a hit at the book club get together, as well as home. My partner ate about 7 in one night, so you know they are good. I even enjoyed this one... just so I could take a picture of the texture on top and in the middle of these babies. It was pure torture. ;)


Ginger Snaps
Makes about 2 dozen cookies

1/4 c. organic vegetable shortening
1/4 c. granulated sugar, plus 2-4 tbs for rolling cookies in
2 tbs. light brown sugar
3 tbs. molasses
1/2 tsp. vanilla
1/4 tsp. xantham gum
1/4 tsp. baking soda
1/2 tsp. cream of tartar
1/8 tsp. salt
1 tsp. ground ginger
1/2 tsp. ground cinnamon
1/4 tsp. ground nutmeg

Preheat oven to 350 and line two baking sheets with parchment paper.

In a bowl of a stand-up mixer with the paddle attachment, combine the shortening and the 1/4 c. granulated sugar, mixing on medium speed until smooth and fluffy (1 min. or so). Add the brown sugar, molasses, and vanilla mixing thoroughly (2 mins. or so).

In a separate bowl, whisk together the flour mix, xanthan gum, baking soda, cream of tartar, salt, ginger, cinnamon, and nutmeg.

Add the flour mixture to the shortening mixture and beat on low to combine, scraping down sides when necessary. 

Using your hands, roll teaspoon (I did slightly larger... maybe a tablespoon) size pieces of dough into balls. 

Pour the remaining sugar in a shallow bowl and roll the balls of dough in the sugar, making sure to evenly coat each cookie. 

Bake in the center rack for about 12 minutes, until puffy and they start to crack. Let cook on sheets before transferring them to a cooling rack.

Enjoy!

Wednesday, April 24, 2013

Gluten-Free flour mixture

I realize that I don't actually have a post dedicated to my flour mixture, and when I say "2.5 cups of gluten-free flour" people are getting confused, so I decided to dedicate a post specific to the flour, in hopes that I will remember to link this recipe to all the times I say "gluten-free flour."

I don't have any pictures of this lovely mixture, but it is what I use in all my baking and cooking items, unless noted in the specific blog post.

So, forgive me that I have been so careless as to not have a gluten-free flour post. :)

Kyrie's Gluten-Free Flour Mix
Makes 5 cups

4 c. superfine brown rice flour
1 1/3 c. potato starch (not potato flour)
2/3 c. tapioca flour (also known as tapioca starch)

Measure flour using a large spoon and scooping into the measuring cup, then level with back of knife. Do NOT use the measuring cup itself to scoop flour--this will compact flour and will end up with too much.

Combine all ingredients in a gallon-size ziplock bag. Shake until well blended. Store in the fridge until you're ready to use it.

I don't think it ever gets old or goes bad... I have had some flour in there for about a month and it's been fine! Also, remember to keep your potato starch and tapioca flour in the fridge once opened. Or you could make as many batches as you can to rid yourself the extra clutter from your fridge. If I know I am going to be baking a lot, I tend to make two batches of this in one ziplock, and it works great!

Tuesday, April 16, 2013

Quadruple Coconut Muffins


I really love coconut. REALLY, REALLY, REALLY love coconut. I think it is delicious. Coconut water, coconut oil, coconut flakes, chocolate covered coconut. All of it. I have not met something I didn't like that featured coconut. So when I decided to make muffins featuring coconut, I knew I was going to use as many forms of coconut that made sense. This, of course, lead to coconut oil, coconut flour, coconut yogurt, and coconut flakes. And trust me, it's all about the coconut with these delicious babies.


There are a lot of health benefits to coconut. I drink coconut water pretty regularly, especially after a hike, before or after a massage, just because I can. It's delicious and so very hydrating. I make my own coconut oil lotion by whipping it up with my stand up mixer, and adding a few drops of essential oils (usually lavendar because the two combined smell heavenly). It's natural and healthy. Yes, it takes awhile to get used to the oily aspect of it, but I have noticed that if I put it on right after I step out of the shower and pat myself dry, my skin eats it up and there's harldy any oil on my skin. I especially use this on my face, since I don't trust any other type of face product on my deliciate little face. I also put coconut in my mouth and swish it around for about 10 minutes. This helps whiten your teeth naturally, but it also helps you feel better if you feel like you're getting sick or are sick. It pulls all the bacteria out of your mouth, and trust me, when you spit it out, you will notice the bacteria in the coconut oil. It's amazing. I also use it for burns, cuts, scratches, or anything else. Needless to say, coconut oil is my go-to everything.


Of course I don't just use coconut on the outside of my body, I also consume it. Regularly. Whether it's making coconut muffins, coconut bread, or putting coconut flakes in my coconut milk yogurt. It's just good.


These muffins are easy to transport to office meetings, brunch, or just to move from your kitchen to the table to eat. I tend to cut the muffins in half and put some vegan butter on them. These are really, really, really good with lemon curd! I don't really like cold muffins, so I always heat them up after the first day. They just taste better, so stick them in the microwave for 20 seconds. It also helps the vegan butter melt and get into the pores of the muffin. :)


These are not sweet, and you can tell that by the amount of sugar that's in these babies. The coconut flour, coconut yogurt, the shredded coconut, the coconut oil... I think it all adds to the sweetness. It's subtle, which makes them a perfect breakfast. You can go into Starbucks and get a treat, and it is just packed with sugar. I hope you enjoy them as much as I do!


Quadruple Coconut Muffins
Yields a dozen


1/2 c. virgin coconut oil
3/4 c. gluten-free flour mix
1/2 c. coconut yogurt
1 tsp. xanthan gum
1 1/2 tsp. baking powder
1/4 tsp. table salt
1 c. plain coconut yogurt at room temp.
1/3 c. granulated sugar
1 large egg at room temp.
1 tsp. pure vanilla extract
1 c. sweetened (or unsweetened, your choice) shredded coconut, divided

Preheat oven to 375 degrees.

Grease muffin pan with coconut oil, or line with papers

Warm your coconut oil either in the microwave or in a small saucepan until it just barely melts.

In a medium bowl, combine the flour, baking powder, xanthan gum, and salt. Stir 2/3 cup of shredded coconut.

In a seperate bowl, whisk together the egg, sugar, coconut oil, coconut yogurt, and vanilla. Stir this into the dry ingredients until just combined. Divide the batter evenly into the muffin tins. Sprinkle top of muffins with the remaining coconut.

Bake about 20 minutes, or until a tester inserted into the middle of a muffin comes clean.

Store in an airtight container for 4-5 days. Although, they usually don't last that long in our house.

Saturday, April 13, 2013

Sauteed brussel sprouts and cabbage


It's been awhile since I wrote a post, forgive me? Things have been crazy in my kitchen lately. What do you mean, you may ask? Ohhh, just this thing of me baking my gluten-free and vegan baked goods at a new coffee shop!


Last week, I prepared: gluten-free and vegan banana flax-seed muffins, gluten-free and vegan snickerdoodles, gluten-free and vegan pumpkin bread, and cranberry bran muffins. So, I have been busy baking, chatting with the general manager, and then working my full-time job, cooking all the time. It's been very busy. I have been very busy, so I needed a quick meal that wasn't going to take me long.


I have never had brussel sprouts, and I was walking through the grocery store just staring at all the vegetables and so I grabbed ten of them. I also grabbed two small heads of cabbage because they looked kind of good. The problem with me going grocery shopping, and being bored while I am grocery shopping means I grab random food I don't really know what to do with it. And then I realized you can pretty much cook anything and make it taste good if you saute it. 


The first think I learned when I started cooking so much, is that you always need to fry your onions and garlic first, because it just adds a totally different flavour. I have to say, it's kind of annoying to cook ALL the time. I am sure I would probably get annoyed with baking all the time, but this new adventure is something that will show me if I am cut out for baking a lot. I will still be working my real job, and then when I come home, I will be making gf and vegan banana flax muffins and gf and vegan snickerdoodles every day. It could be extremely tiring, but I am going to try. If it ends up being too much, I will try and work something else out so that I can still provide baked goods for them, but maybe not every single day. 


Anyway, getting back to this meal, it really turned out so much better than I thought it would be. I am sure it would taste even better if things were sauteed in butter, because honestly, butter! Like Paula Dean always talks about... butter, butter, butter. 


Roasting some sunflower seeds is what I did to add a little crunch to all the softness of the cabbage and brussel sprouts. I actually ended up loving the brussel sprouts just on their own--I don't know why so many people hate them! I think I enjoyed them so much. 


I had all these things sitting in the fridge for over a week, including asparagus, so I needed to cook them all. This last minute idea was pretty quick and delicious. And it was really filling. It's so nice to eat good food that makes you feel good. Even when you have a crappy day. It tends to lift you up.


Sauteed Brussel Sprouts and Cabbage
10 brussel sprouts
2 small heads of cabbage
1.5 c. roasted sunflower seeds
1 onion
6 cloves of garlic
Salt and pepper to taste
Olive oil to coat pan

Wash all the brussel sprouts and the cabbage. Cut the brussel sprouts in half and shred the cabbage like would cole-slaw. Cut the onions in half and slice the six cloves of garlic.

Heat the oil in a skillet. Once heated, toss in onions and garlic. saute for 10 minutes until things get a little crisp. Add the brussel sprouts and cabbage. Cover with a lid and let cook for 15 minutes.

Once the cabbage has shrunk in size, toss the ingredients in the pan, and cover for a another 15 minutes.

Meanwhile, take the sunflower seeds and put them on a baking sheet and put in the oven at 350 degrees until they start to brown, about 10 minutes.

Once the sunflower seeds are done, toss them into the brussel sprouts and cabbage.

Toss them altogether in the pan.

Put in a bowl, grab some chopsticks, and enjoy!

Wednesday, April 3, 2013

White bean and Kale stew

I do a lot more baking than I do cooking. Or rather, I am more excited to bake than to cook. As you can tell from most of my posts, I am a baker at heart, and it's what I do for comfort and enjoyment. I am in the process of figuring out, or rather, trying to get the courage, to make a bakery happen here in Flagstaff. An all organic bakery that specializes in gluten-free, dairy-free, and vegan baked goods. As well as baking up some treats that have all those things in them. Although, I am 100% positive that most people who would try my stuff would not even be able to tell that the desserts/baked treats they are consuming are gluten-free and vegan. I really am THAT good. You may think I am just being overly confident, but I don't know many people who have a strict diet like I do, and I tend to always bring baked goods to get togethers, and no one ever notices that the baked good they are eating, is free from all the things I am allergic too. It's pretty funny to see people's reactions when they ask me what's in it and the first thing I tell them are the things that ARE NOT in it. It makes me very happy and proud that I can create items that people enjoy.

I also believe in the importance of buying things local and organic. With the new Monsanto Act just signed (Why, America? Why?), it is even more important to pay attention to what we are consuming. There are a lot of studies out there that shows GMO's to be extremely harmful to all animals (they do testing on mice and rats, and it's just so sad to see what happens to them). We don't buy any GMO foods (how do you do this, you ask? You do the most obvious thing... you look on the package of an item for "no-gmo"). It really is quite easy. It's better for the environment, and it is better for us. There is much literature about the importance of an organic based diet, as well as supporting your local farmers. The produce is so much better when you get it local. And if you're lucky enough like me and my partner, you can plant a huge garden right in your back yard with all organic seed. If you don't have a huge yard, you can always plant lettuce in planters (you can fit a good 4-6 head of lettuce in a pot). There are ways to incorporate healthy food in your diet without pay a fortune. And growing your own foods is one of the best feelings in the world. It's nice to be working out in the backyard and picking a tomato or a pepper off the vine and biting into it while you're working.

Enough on that rant. I didn't take any pictures of this dish because it was so ridiculously easy and I needed to hurry out the door, but it is delicious. It's done in a crock pot, left to cook all day long, so when you come home after a long day at work, your house smells like someone has been cooking all day. There is something about crock pot cooking that makes me happy. I know I am using good ingredients, and only doing a little bit of work to make something so delicious. And there's left overs. :)

White bean and kale stew
6 servings

1 tsp. olive oil
1 onion, chopped
2-4 garlic cloves, minced (I like things super garlic-y. if you don't, stick with 2)
Salt and pepper to taste
1 tbs. balsamic vinegar
4 c. washed and chopped kale
1 tsp. dried oregano
5 c. water
2 15 oz. cans of white beans, unless you're patient like me and have some soaked overnight
2 tsp corriander

Either the night before, or the morning of, heat oil in a skillet and saute the onions until translucent. Add garlic, salt, and pepper, and cook for about another minute or two. Add the balsamic vinegar and stir to combine. If cooking the night before, store in a container in the fridge. If preparing the morning off, add to crock pot.

Add rest of ingredients except kale to the crock pot. Cook on low for 6-8 hours. About 30 minutes before you're going to serve, add the chopped kale. Cook for another 30 minutes, taste, and adjust seasonings to your liking before you're ready to serve. 

Sunday, March 31, 2013

Vegan date bars


My relationship with dates is a new one. We just met last summer, and I was a little hesitant of them. The ones I had been given were from a local farm here in Arizona, and they were sooooo sweet—like biting into a piece of caramel. They were good, but it made my teeth hurt (you know the feeling when you bite something sweet or sour and your sweet tooth does a little ache? That's what it was).


So I gave them a break for a while. I was thinking about what I could do with dates. They are extremely healthy for you, and they are sweet enough to be a dessert, so of course I was thinking about all the ways you could incorporate dates into a dessert. A lot of Paelo and Raw recipes use dates as a binding factor for things like crackers or pie crusts... I didn't want the date to be something that holds another something together. I wanted the date to be on display. The highlight of the dessert I was making.


Eventually something came to me. I am a sucker for dessert bars. There is something so delicate but not formal about them. I make a lot of fresh peach or nectarine bars when the fruit comes back into season because I like the way the crust and fruit just go together. And that’s when it hit me… I will make date bars!


The way the water and dates work together to make a caramel-like sauce is amazing. I like that the dates don’t actually disappear, that there are obvious chunks of them in the bar, but that they are smoother and silkier being boiled down. Add a touch of vanilla, and they really are like caramel.


They are extremely easy to make, but do take a while since you have to wait for the date mixture to cool down before putting it on top of the crumb mixture. I tend to stick mine in the freezer to hurry up the process.


Vegan Date Bars
16 bars

2 c. pitted Medjool dates, chopped
1.5 c. water
1 tsp. vanilla
1 c. packed brown sugar
1 c. gluten-free old fashioned oats
3/4 c. coconut flour
3/4 c. brown rice flour
3/4 c. (1 and 1/2 stick) Earth Balance butter, room temperature and cubed
1 c. shredded coconut (optional)
1 tsp. baking soda

Heat oven to 350 degrees F.

In saucepan, combine dates and water, bringing to a boil over high heat. Reduce heat and simmer, uncovered and stirring occasionally for 10-20 minutes, or until dates are soft and mixture is thick. Add the vanilla, stir, and let cool to room temperature (to expedite the process, you can place in the freezer for about an hour).
While dates are cooling, in a large bowl, add the rest of the dry ingredients. Mix well before adding the butter. With hands, or a pastry blender, mix in the butter until it forms into a dough.

Oil a 9x9 square bake ware and press half the dough mixture firmly in the bottom (If you like more crust, and less topping, add a little more to the bottom). Spread date mixture over the bottom of crumb mixture, and place the remaining crumb mixture on top of the date mixture. I like to pack it down and make sure everything is firm.

Bake in over for 40-45 minutes, or until the top starts turning brown. These are delicious fresh out of the oven or with your coffee/tea the next morning. I took these to my book club meeting this past week, and they were a hit!

Keep covered for a week.