Sunday, March 31, 2013

Vegan date bars


My relationship with dates is a new one. We just met last summer, and I was a little hesitant of them. The ones I had been given were from a local farm here in Arizona, and they were sooooo sweet—like biting into a piece of caramel. They were good, but it made my teeth hurt (you know the feeling when you bite something sweet or sour and your sweet tooth does a little ache? That's what it was).


So I gave them a break for a while. I was thinking about what I could do with dates. They are extremely healthy for you, and they are sweet enough to be a dessert, so of course I was thinking about all the ways you could incorporate dates into a dessert. A lot of Paelo and Raw recipes use dates as a binding factor for things like crackers or pie crusts... I didn't want the date to be something that holds another something together. I wanted the date to be on display. The highlight of the dessert I was making.


Eventually something came to me. I am a sucker for dessert bars. There is something so delicate but not formal about them. I make a lot of fresh peach or nectarine bars when the fruit comes back into season because I like the way the crust and fruit just go together. And that’s when it hit me… I will make date bars!


The way the water and dates work together to make a caramel-like sauce is amazing. I like that the dates don’t actually disappear, that there are obvious chunks of them in the bar, but that they are smoother and silkier being boiled down. Add a touch of vanilla, and they really are like caramel.


They are extremely easy to make, but do take a while since you have to wait for the date mixture to cool down before putting it on top of the crumb mixture. I tend to stick mine in the freezer to hurry up the process.


Vegan Date Bars
16 bars

2 c. pitted Medjool dates, chopped
1.5 c. water
1 tsp. vanilla
1 c. packed brown sugar
1 c. gluten-free old fashioned oats
3/4 c. coconut flour
3/4 c. brown rice flour
3/4 c. (1 and 1/2 stick) Earth Balance butter, room temperature and cubed
1 c. shredded coconut (optional)
1 tsp. baking soda

Heat oven to 350 degrees F.

In saucepan, combine dates and water, bringing to a boil over high heat. Reduce heat and simmer, uncovered and stirring occasionally for 10-20 minutes, or until dates are soft and mixture is thick. Add the vanilla, stir, and let cool to room temperature (to expedite the process, you can place in the freezer for about an hour).
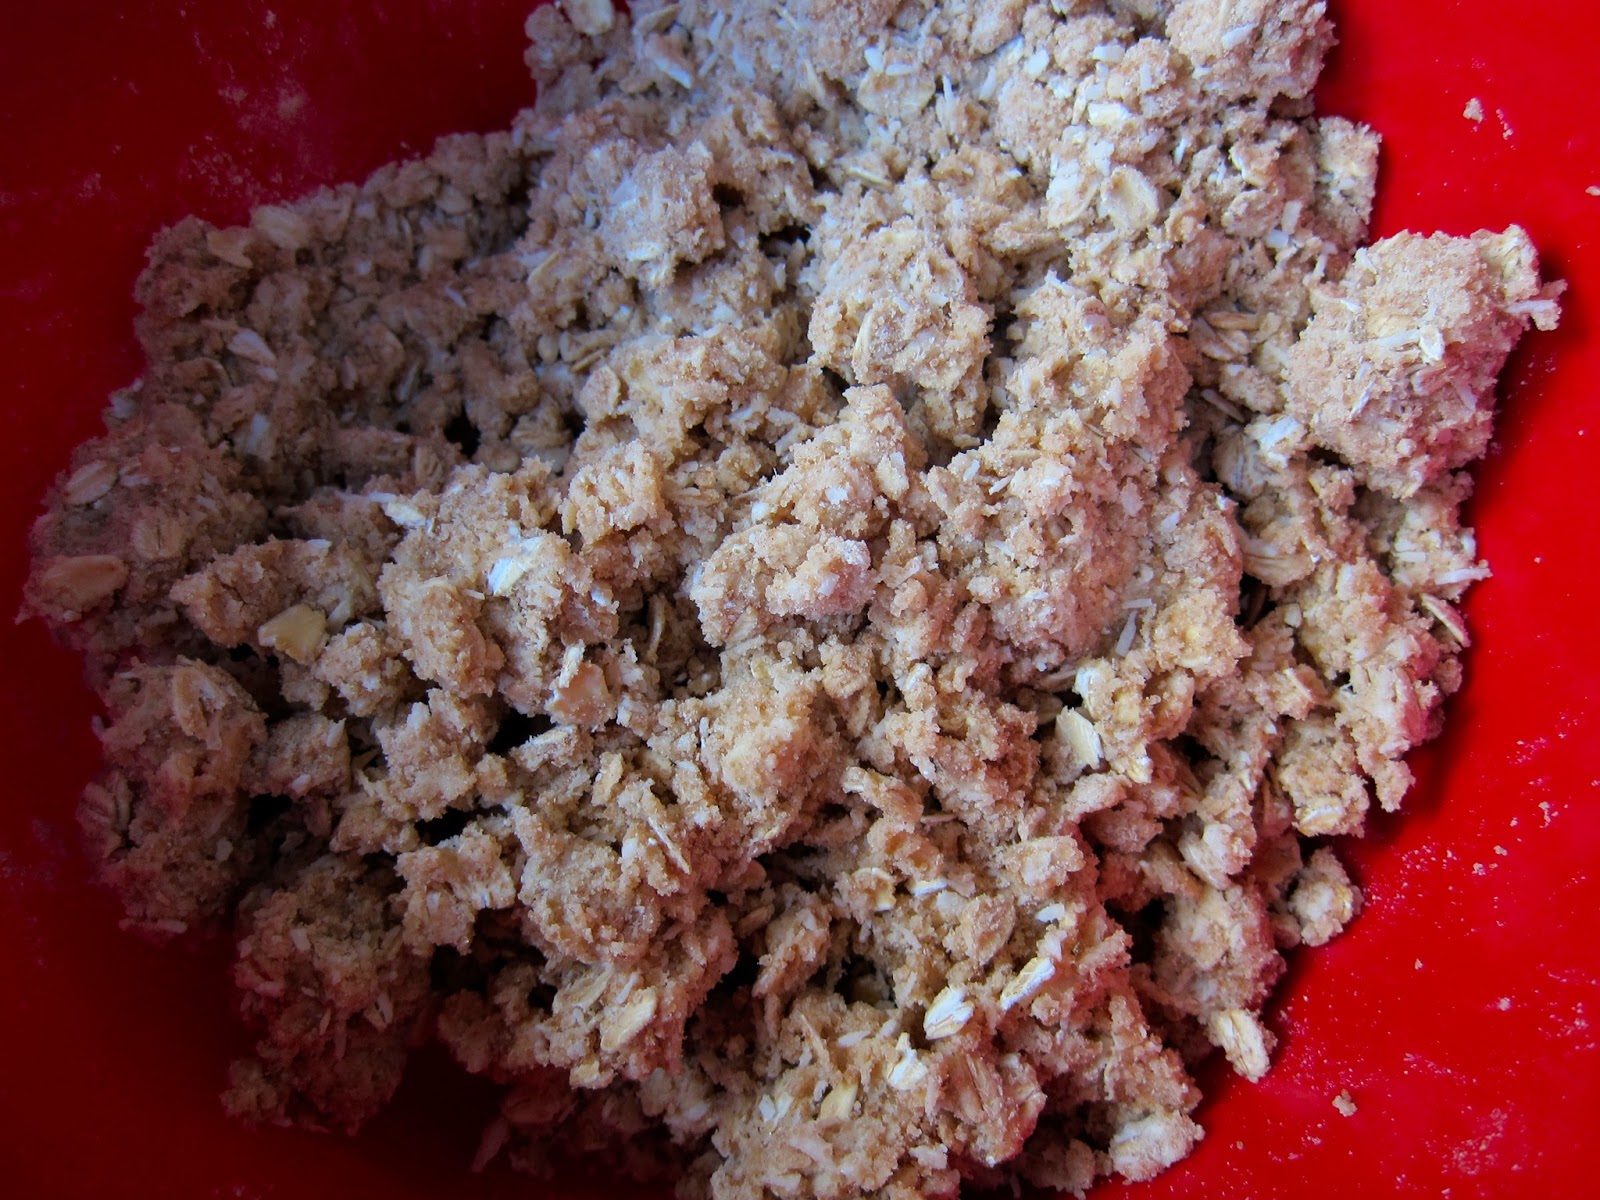
While dates are cooling, in a large bowl, add the rest of the dry ingredients. Mix well before adding the butter. With hands, or a pastry blender, mix in the butter until it forms into a dough.

Oil a 9x9 square bake ware and press half the dough mixture firmly in the bottom (If you like more crust, and less topping, add a little more to the bottom). Spread date mixture over the bottom of crumb mixture, and place the remaining crumb mixture on top of the date mixture. I like to pack it down and make sure everything is firm.

Bake in over for 40-45 minutes, or until the top starts turning brown. These are delicious fresh out of the oven or with your coffee/tea the next morning. I took these to my book club meeting this past week, and they were a hit!

Keep covered for a week.

Tuesday, March 26, 2013

Coconut Tapioca Pudding


I really enjoy tapioca pudding. I remember my grandma always buying a container when I went to go visit, and trying so hard to make it last the entire time I was there. It was just so good. Since becoming even more sensitive with my allergies, I haven't had tapioca pudding in at least 10 years. I missed it, and I decided to try and cook some up myself. And let me tell you, this tapioca pudding beats anything you can buy at the store. And since we all know how much I love coconut, it only made sense for the tapioca pudding to be coconut infused!


This is a pretty quick cook, besides the fact that you soak the tapioca in milk overnight, but that's pretty easy to do! You easily forget about it. And, it does take about 4 hours for the pudding to set up (I always place it in the freezer for an hour ot two so I can eat it sooner). It's a pretty easy recipe that can be tweeked or left alone.


This tapioca reminds me of those days spent at my grandma's house. But ten time better. It's a great treat to bring to parties (I think we all have memories of tapioca pudding) that will spark happiness. The texture is so creamy, and the coconut flakes add a little roughness to the creaminess. It's such a good mix. I can't explain how good this is, and with such simple ingredients (I forgot to picture the cornstarch), it's a simple dessert that lasts quite awhile. 

Coconut Tapioca Pudding
Serves 6, generously

2 cups oat milk (or any other form of non-dairy milk except coconut milk (I use less of this milk, so I can add the whole can of coconut milk))
1/3 c. tapioca pearls
1 c. coconut milk
1/4 c. agave syrup
1 tsp. vanilla
1 tsp. cornstarch with 1 tbs. water mixed in (you can also use arrowroot if you don't have any cornstarch on hand)
1/4 tsp. salt
1/2 to 3/4 c. shredded coconut (optional)*

In a large pot, soak the tapioca overnight with 1 cup of the oat milk. The tapioca will fluffy up and get big, much like beans. If you notice the liquid being all soaked up, add a dash more until you're ready to cook.

When you're ready to cook, add the other cup of milk and warm the mixture over medium heat. Wait until the pudding is boiling, and then add coconut milk, agave, and vanilla. Cook for another 10 minutes, stirring constantly. The way you can tell it is ready is when all the tapioca pearls become translucent and lose their white colouring.

Add the cornstartch-water mixture and salt, cooking and stirring for an additional 5 minutes. Add the shredded coconut, mix thoroughly, and place in a glass or ceramic bowl (no plastic, as the heat will make the toxins from the plastic leak into your pudding). Place in the freezer (or fridge if you can wait 6 hours) for an hour or two, until set and no longer hot.

Serve and enjoy! It is a little on the rich size, so I tend to only eat a couple bites to get my sweet-tooth craving under control. Keep in a covered container for 5 days, if it lasts that long.

*This would be really good with sliced almonds, or maybe some dried craneberries! Or maybe some spice like cinnamon! I encourage you to experiment. I just always do coconut cause I know it's so good!

Friday, March 22, 2013

Romaine Pesto Stuffed Tomatoes


I love experimenting with different foods. I tend to find a recipe and change it about 50% to make it my own. I think that's the way you learn to cook, you find a base, and you change it all if you can. You add what you want, take out things you don't and just find what works for you. The one thing that was interesting about this meal is that it involved tomatoes. I don't really like store bought tomatoes. I refuse to eat them most of the year, until we can grow and harvest are own. The ones from our backyard are just way too good and I miss them. But, I decided to give this recipe a chance and take the plunge and buy tomatoes. 


I am growing some romaine lettuce now, but they are still in the dirt, growing and waiting to make their appearance, so I had to buy a head of romaine, even though I only used about 6 leaves. I will make a salad with the rest of it this week for lunch. We grew a ton of different greens last year: three types of lettuce (each with three plants per type), collards, kale, chard. Our garden was flourishing and so delicious. The basil to the right of the lettuce in the picture above is still growing in our sun room, and it smells so good!


I don't really like pesto all that much. I think it's just too much basil. So I decided to try a romain pesto. It's essentially the same thing, but so much better. I added a little bit of cheese to it to add a little punch, and boy howdy, did it make a difference. With 5 cloves of garlic, I am sure that helped too. But honestly, I will never make normal pesto again. This will be used in pastas from now on!


We were doing spring cleaning Saturday, since my partner was suffering from an allergy attack from the juniper pollen. Because we were spring cleaning, I wanted to eat spring based foods! Tomatoes are finally looking some-what appealing, the chickens are laying eggs (or at least, my boss's chickens are laying eggs, which he is graciously giving us some), and pesto just reminds me of spring. I don't really remember what type of tomatoes I bought, but they needed to be bigger and rounder than romas. These were the only ones I could find at our health food store, and they did the trick. Although, I would recommend buying bigger ones, since the egg did spill over. 


This was a great, easy, and healthy meal to make. I ended up making six last minute, but I still have left over pesto. I am sure if you only want to make 4, you could use 4 pieces of lettuce and it will do you just fine.

Romaine Pesto Stuffed Tomatoes

6 large rounded tomatoes (3-4 inches in diameter)
6 leaves of romaine lettuce
5 cloves of garlic
4-5 leaves of fresh basil
1/4 c. cheese, if using
1/4 c. extra virgin olive oil
6 eggs at room temperature
Salt and Pepper to taste

Preheat oven to 400 degrees.

Clean tomatoes, lettuce, and basil well, and pat dry. Rip romaine lettuce in 2-3 inch pieces. 

In a food processor, finely chop the garlic. Add romaine lettuce and basil to food processor. Once everything is evenly cut, add cheese. Give it a quick pulse until it's mixed in, and with the motor still running, slowing add the oil. Do a little taste test and add some salt and pepper. Set aside.

Cut the tomato tops about 1/8 inch from top, and cut a little bit from the bottom so the tomato stands up straight without slipping around. Carefully scrape out the pulp and seeds with a spoon and discard them. Put the tomatoes in an oiled 8x8 backing dish, cut side up. 

Take about 1 tablespoon of the romaine pesto and place inside the tomatoes. Once all tomatoes are filled, crack an egg into each tomato and season with salt and pepper. Bake eggs in tomatoes until the whites are set and yolks are still runny*. About 20 minutes.

*I over cooked some of the eggs yolks, and some not so much. I think the bigger tomatoes will help evenly distribute the egg whites a bit more. Since these were quite small, it took awhile for the eggs whites to set, which in turn, over cooked the yolk. The wider the tomatoes, the better!

Wednesday, March 20, 2013

Chocolate Chip Cookies


With becoming gluten-free, dairy-free, and mostly vegan, sometimes it is really hard to find good and organic baked goods. This is why my home-based bakery specializes in organic, gluten-free, and vegan baking. There are classic items that you think you can't eat anymore when you switch your diet to a gluten and dairy-free lifestyle. Classics such as chocolate chip cookies.


I think everyone has grown up eating chocolate chip cookies. I was in love with them when I was little. I remember eating so much dough when my mom wasn't working. She'd make the dough and let the dough chill in the fridge. While she was at work, I took my little hands and just dug right in. I don't ever remember getting sick from this, but I do remember going into a cookie dough comma at one point. She never mentioned anything, but I am sure she knew what I was doing. Parents seems to just know these things.


I roll out my cookies, always have been a roller, always will be. They are more aesthetically pleasing for me. I don't like blobs of cookies, I want a rounded cookie! I also think this really does help with them staying in place and not melting together. But, do as you wish! I find chocolate chip cookies, straight from the oven, one of the biggest comfort foods. Something about the way they smell baking, to biting into hot, gooey chocolate cookies that make me forget about all the problems that may be happening.


I really like my chocolate chip cookies to have a little bit of crunch around the sides, and then a soft gooey middle. I like the difference between the toffee like flavour of the outside of the cookie, and then the cookie part of the middle together. My partner just likes them soft, so I end up doing half the batch the way he likes it, and the other half the way I like it. It works perfectly. 


Chocolate Chip Cookies
Makes 24-36 cookies depending on the size you want

3/4 c. dairy-free, soy-free vegetable shortening
1/2 c. plus 1 tbs. granulated sugar
1/2 c. plus 1 tbs. firmly packed light brown sugar
2 1/4 tsp. pure vanilla extract
2 1/4 tsp. egg replacer mixed with 3 tbs of oat milk
1 1/2 c. plus 3 tbs. gluten-free flour mix
3/4 tsp. xanthan gum
1 1/8 tsp. baking soda
1/2 tsp. salt
1 c. plus 2 tbs. dairy-free, soy-free, chocolate chips (I use a whole bag for extra chocolate)

Preheat oven to 350 and line baking pans with parchment paper or oil.

In a bowl of a stand mixer with paddle attachment, cream the shortening and both sugars together on medium speed until light a fluffy (2 minutes). Add vanilla and the egg replacer and mix for another 20-30 seconds, scraping down the sides.

In a separate bowl, whisk the flour, xanthan gum, baking soda, and salt together.

Add flour mixture to wet mixture in two batches, mixing on low speed, and just until it all comes together. Gently fold in the chocolate chips.

Roll the cookies into balls, placing them a few inches apart, and squishing the middle down a little with your palm.

Bake for 10- 12 minutes minutes, or until lightly brown. If you want yours extra gooey, bake for 8 minutes. Luckily, there's nothing in these cookies that could get you sick if they are not done all the way.

Eat straight from the oven. With tea. Or a scoop of Vanilla Coconut Milk ice cream.

Will keep for about 5 days in a sealed container.

Note: if you notice your dough is warm, and you like puffy cookies, put the dough in the fridge for 30 minutes to an hour. It makes the dough less likely to flatten out or crisp around the edges.

Sunday, March 17, 2013

Blueberry Scones

Well, as you could have guessed from my last post, it's only natural that I ended up making scones. Since spring time is coming, all the fruit I have been missing is coming back into season. We bought some blueberries a couple days ago, and I just knew that I was going to make scones. I just had to wait until I had the time. I feel like I am just as busy now as I was in Grad school.


We slept in Saturday morning, and when I woke up, I got straight to work on making scones. Which also explains why the pictures are so crappy. Sorry, I am trying to figure out the lighting here in the house for picture taking. Once it get's warmer, I am hoping to implement our garden into the pictures more, since we'll be using most of that produce for all our summer cooking/baking.


I used my flour mixture, which, in my opinion  is the best gluten-free flour mixture. Now, me sharing this with you is a big step, because I am kind of selfish when it comes to recipes. But I am trying to grow and share... and remember all the lessons you learn when you're a kid. ;) Anyway, the gluten-free flour mixture is a combination of 3 different flours/starches, and makes about 5 cups a batch. Which is perfect because I usually only use 1.5 cups of this flour when baking. Except with the scones, because they take a whopping 3 cups!


These scones are my speciality. It took me quite some time to really master them. To include secret ingredients (that I won't share here) to make them just the way I want them. There's a ton of variation to this recipe. You could use any type of fruit you want, except maybe the watery fruits like kiwi and mango, or you could just leave the fruit out, and add a 2 teaspoons of vanilla to it. Or, you could go super bland, and just do nothing. Your choice. The possibilities are endless with this baby.


The two of us each had three this morning, and are looking forward to tomorrow morning when we can have more. We took the lemon curd that I made the other night, and dolloped our scones with it. There are numerous ways to eat scones. I prefer to cut mine in half and put lemon curd on each half, while my partner likes to just dollop the lemon curd on the whole scone. I love the colour of the yellow and blue from the blueberries. It makes this delicious purple swirl of colour. And the lemon and blueberries just go so well together, I have a hard time making any other type of scone. :)


Kyrie's Gluten-Free Flour Mix
Makes 5 cups

4 c. superfine brown rice flour
1 1/3 c. potato starch (not potato flour)
2/3 c. tapioca flour (also known as tapioca starch)

Measure flour using a large spoon and scooping into the measuring cup, then level with back of knife. Do NOT use the measuring cup itself to scoop flour--this will compact flour and will end up with too much.

Combine all ingredients in a gallon-size ziplock bag. Shake until well blended. Store in the fridge until you're ready to use it.

Gluten-Free Blueberry Scones
Makes 12-16 scones depending on size you make

1 (6-ounce) container of plain coconut milk yogurt
3/4 c. oat milk (or your choice of non-dairy milk)
3 c. gluten-free flour mixture
3/4 tsp. xanthan gum
1/3 c. granulated sugar
2 tbs. double-acting baking powder
1/4 tsp. salt
1/3 c. canola oil
1 container of fresh blueberries

Preheat oven to 400 degrees. Line baking pans with parchment paper or oil.

Whisk together the yogurt and milk in a small bowl. Set aside.

In a larger bowl, whisk together the flour, xanthan gum, sugar, double-acting baking powder, and salt.

Add the milk and canola oil to the dry ingredients, as well as the blueberries. Mix until there's no more dry flour and everything is evenly distributed and combined.

Flour a work surface (I use a medium-sized cutting board) with a little bit of the gluten-free flour mixture. Take half the scone mixture and place on prepared surface. Pat into a 6 to 8 inch disk and cute into wedges, like you would a pie. Place the triangles on the prepared baking pan, and repeat with the rest of the dough.

Bake in oven for 15 minutes, or until they are lightly golden brown. Eat right from the oven, and dollop lemon curd or jam of your choosing on top.

Store in ziplock bag for 2-3 days (if you have left overs).

Saturday, March 16, 2013

Lemon Curd

I am obsessed with scones and lemon curd. I think it probably started when my Aunt and Grandma started taking me to high tea in San Francisco as a little girl. We would go somewhere (I can't recall the name. It might have been the Ritz) and we would drink tea and eat alllll the little snacks. The cucumber sandwiches, the cookies, the petit fours, and most importantly the scones that I would slather with clotted cream ad lemon curd.


Then, when I was 20, I moved to England for six months, and there are scones everywhere in England. Scones, clotted cream, and lemon curd everywhere, and I ate them so much. I came back, and I never tried to recreate lemon curd, but I did start making scones. I stopped making scones for awhile because I had to stop eating flour. But then I made my flour, and I started making scones. I make scones at least once a month, but usually two or three times a month. I really have nailed the scones.


So, in order for me to have dairy-free lemon curd, I have to make it myself. Which is TOTALLY fine, because my lemon curd is really quite good and tastes just like anything from England or anywhere else. I also refuse to eat scones without it, so, as you can guess, I will be making scones in the near future. :)

My partner's mom sends us true British black tea from England, so it's always takes me back to my England days of drinking black tea, eating scones with lemon curd, and enjoying life. And luckily, I have someone who enjoys it just as me, if not more.


You have to make the curd the night before you want to eat it. You have to cook it, and then in order for it to set, you have to put it in the fridge for a good 8-10 hours. It thickens up and the lemon tastes so good. One of the problems with lemon curd, is that if you cook it too long on the stove top, your lemon curd will taste like nasty egg. Yes, I've experienced, and yes, it really is god awful.


I use more lemon than most, because I like my lemon curd to be really lemony. The first time I made it, I only used a half cup of fresh squeezed lemon juice, but since I have made this so much, I usually up the lemon juice to a cup. But, if you're looking for something not so tart, stick with the half cup. 


While you're mixing everything up in the blender, it will look chunky and gross. The lemon juice doesn't necessarily curdle the egg, sugar, and vegan butter mixture, but it does something to it that makes it weird. I am sure it has to do with the acidity in the lemon. 


But once you start to heat it up, the sugar starts to melt and it becomes this beautiful yellow sauce. As I mentioned before, please be extremely careful when cooking this. It can turn on you in an instant. If you have a candy thermometer  I suggest you pull it out. You want this to get to 160 and then immediately stop cooking it. If you don't, I have noticed that cooking it for 8 to 10 minutes is perfect.


Once you're done cooking it, I would suggest putting it directly in jars. I use canning jars, but with this recipe, you're gonna have a little extra, so I use just a miniature jar we have laying around in our glass jar stash. The way we eat this is with scones, but it also tastes really good with shortbread cookies, toast, and in cakes as a filler. Feel free to experiment!

Lemon Curd
1 stick of butter at room temperature
1 1.5 cups of sugar
1/2 cup of freshly squeezed lemon juice (more if you're wanting something tart)
4 eggs

Blend the butter and sugar on medium speed until it comes together. Add the eggs one at a time until they are combined with the sugar mixture. Once eggs are combined, add the lemon juice.

Once these are all mixed together, transfer to a medium size pot and turn the stove top to medium-high (I usually put it between 4 and 5). Cook, stirring constantly until the mixture has changed to a brighter colour, has gotten a little bit thicker. This will take between 8-10 minutes or until you reach between 150-160 on a candy thermometer.

Pour into jars immediately and let cool at room temperature for two hours or so (if you have more time, that's fine). Cover jars and place in the fridge overnight.


Friday, March 15, 2013

Spinach bake and fried eggs

Sheesh. This past week has been hectic! After last Tuesday, I woke up at about 1.30 in the morning with the most excruciating pain in my stomach. It felt like I was getting stabbed in my stomach. I woke up at 5 in the morning Wednesday and was sick. Not just the sniffles sick, but SIIIIIICK. And it wouldn’t stop. I asked myself many times, “how the hell is all this in my body? Why hasn’t it stopped?!” Needless to say, I didn’t eat or do any cooking on Wednesday. I stayed on the couch half the day, and when I wasn’t on the couch, I was in the bathroom.
The verdict? Norovirus. It’s awful. AWFUL! I was only sick Wednesday, and went back to work Thursday, although I didn’t really eat anything because I was to traumatized at the event of Wednesday, I didn’t dare touch a piece of food. So that was Wednesday and Thursday. The rest of the week? Well, let’s just say life got the best of me. Between the giant blizzard that dumped more than a foot of snow in 24 hours, to driving down to Phoenix for my partner’s fencing tournament, it’s been crazy. And now it’s Friday and I am ready for the weekend
But I am back! Sorry I was gone for so long. It’s Friday (YAY!) and it’s going to be about 70 degrees here in Flagstaff (BIGGER YAY!). I wore shorts today to embrace the warm weather and by doing so, hopefully telling the Universe that this is the weather that I want for the rest of the spring and summer.  

Tonight I decided to try something new! I grabbed three bunches of spinach from the store and cleaned the hell out of the spinach. Spinach is AWFULLY dirty, and it takes forever to clean. You can't really tell, but that water, is FILLED with sediment and dirt. 


I haven't been consistent with eating since I got so sick last week, and we've been so busy, that I made it a REQUIREMENT for me to cook tonight, because I needed to cook. One of my bosses has six chickens, and him and his lovely wife, who I consider very good friends, gave me some eggs. These eggs are so beautiful! There's white, brown, and even green! They taste so good... When you crack them open, the yolk is all orange and large. So. Good.


I am pretty sure that when you add butter (or something similar to butter) with onions, spinach, and garlic in a pan cooking, it just smells so good. We left work after three hours and decided to go fly fishing! I actually didn't fly fish, but I helped put together a fishing rod!


We didn't make this a vegan meal, because I REALLY wanted cheese. Aged cheese, of course, so I don't end up getting sick all over again, and let me tell you, this was a good idea. The sharp cheese from England was perfect with this dish. It added a great taste to it. 


I think you could eat anything with fried eggs. I have been on a roll with fried eggs. I want them on everything that I can have them on. I like them more than scrambled, probably because with fried, they don't have a weird texture like scrambled eggs have.


I also make the best freaking asparagus in the world. I don't really know the measurements. I cut them, I put olive oil on them, added a couple shakes of garlic salt, and pepper. You bake them till they get crunchy like french fries. They really are so good. My partner hates asparagus, but he loves mine! So that means I have something good up my sleeve!


 This was a great and different dinner. We both liked it. I think the eggs helped! :)

Spinach Bake and Fried Eggs:

3 bunches of spinach
1/2 red onion, diced
5 cloves of garlic, minced,
3 tablespoons of vegan butter (I use Earth Balance)
1/2 cup of cheese (vegan cheese, normal cheese, whatever your heart desires)
1 cup of vegetable stock
1 1/2 tsp of flour
4 eggs (two per person)

Pre-heat oven to 375 degrees.

Clean the spinach. Clean it REALLY, REALLY, REALLY well. Spinach is tricky and holds a lot of sediment, so I cleaned mine about four times. Once it's cleaned, you're going to de-stem it. I did this by simply pulling and twisting the bottom part of the spinach bunch. I am sure if you were to use baby spinach, you wouldn't have to do this.

Place the clean and de-stemmed spinach in a pot on medium heat and just cook it until it shrinks. This will take about 2-3 minutes. Once it's shrunk, place the spinach in cold water to shock it (stop it from cooking) and then drain it again.

Heat the "butter" in the pot until it melts. Start dicing up the onions and garlic. Once you're done, add all the ingredients into the pot and let it cook. Once the water from all the ingredients starts to leave (things will start to stick to the pot), add the flour and stir. Once incorporated, add half the stock and stir. Let it simmer, and if it is still really dry, add the rest of your stock. While things are simmering  you can grate some cheese if it isn't already grated.

Once all your ingredients have come together nicely, add the cheese, stir, and then place in an oiled 8x8 pan. Place in the over for about 30 minutes and cook until the top is a little bit golden brown.

In order to keep the bake warm, turn off the oven while you start frying the eggs. We ate two eggs each, and it was delicious. The yolk mixed perfectly with the spinach bake. Although, my "bake" doesn't mean that it's stiff. This was a little runny and I think it was perfect. I don't think it would be good if it was like a cake consistency.

Sorry the pictures are crappy. I couldn't find my camera, so I used my phone, and the light in our kitchen is pretty dim once the sun sets a little. But, it's still tasty!

Enjoy!

Tuesday, March 5, 2013

Fresh Taco Salad

In Arizona, taco salads usually consist of greasy ground meat (or chicken), hardly any vegetables, which are then placed in a large fried dough bowl. Not very appetizing in my book, nor nutritious.

My partner and I each have activities to do on Tuesday nights. He goes off to fence, and I go off to cake decorating. I have to leave by 5.30 and he doesn't have to leave till 6.30. So, when we come home on Tuesday nights, we usually do something quick, fresh, delicious, and healthy.

We came up with our own version of taco salad that was healthy and nutritious. We add things here and there to make it more interesting, especially since I get burnt out on food easily.

It starts out with cooking some vegetarian and organic black beans in the cast iron. No water, just hot oil and beans. We like this way better than boiling because you can still taste the beans and they are not water logged.


We try to eat all colours of the rainbow. Well, we try to eat this way for at least ONE meal. Sometimes it's a little hard in the morning and in the afternoon.  Things are a little rushed in the morning, so it makes it hard to make a balanced meal. When we do eat all colours of the rainbow in the morning, it's usually when we juice. So, we cut up a bunch of fresh fruits and vegetables. Tomatoes and sweet peppers, bell peppers, jalapeno, green onion, and red onion. It's really quite pretty when it's all sliced and waiting for me.

Then, instead of the fried bowl of dough, we eat some delicious, organic, non-GMO chips. The Red Hot Blues are by far my favourite chips, and they add extra salt and some spice to the beans. It's all about moderation, and sometimes it is EXTREMELY hard to stop eating these chips. But, it's all about control.


The end result is this beautiful, delicious meal. It really is the colour of the rainbow, and it makes me so happy. It makes my stomach happy! I have been dealing with some stomach issues, so I am really trying to limit what I am eating to figure out what's going on. 


I was diagnosed with Irritable Bowl Syndrome (IBS) this January, so I am working really hard to make it a little less of a pain in my ass. It is already pretty easy since I eat pretty healthy, but I am keeping more track of exactly what can trigger it. I need to start a food journal to really narrow it down more, but I haven't found a journal yet. Lame excuse, I know, but sometimes I just can't imagine writing down EVERYTHING. Just seems tiring. :)

Fresh Taco Salad
Serves 2

2 15 oz. cans of black beaks
Half a bell-pepper (your choice, but I recommend orange)
6 cherry tomatoes
Two slices of red onion
Half a jalapeno
Slices from a bunch of green onion
3-4 small sweet peppers 
1/4 tsp. salt
1 tsp. pepper
1 tsp. cumin
Corn chips of your choice

Heat cast iron skillet (or a skillet you have) with some olive oil. While the pan is heating up, drain and rise the black beans until there are no more bubbles coming from the beans. Once the oil is hot enough, place the beans in the pan, covered, and start to cook. 

Meanwhile, start washing all your produce and slice things up until they are the size you want.

Place all the spices with the beans and stir until all incorporated. I usually cook the beans for about 20 minutes, or until all the beans are soft. When beans are crunchy, it tends to be an instant gas initiator. 

Once the beans are all cooked, place them in a plate/bowl, and load up the vegetables and fruit. I tend to mix it all together with a fork so that it's a nice mixture. Grab some chips, and start scooping up the food. 

*All food--whether processed or from the ground is 100% organic and non-GMO, unless mentioned otherwise. Which will most likely be never. There are some extremely helpful articles as to why you should eat organic, as well as cut as many processed foods as humanly possible. :)


Monday, March 4, 2013

Welcome

Hi! My name is Kyrie, and this is my kitchen. I do a lot of baking, and quite a bit of cooking. I have dietary restrictions and I am picky, which makes it frustrating to go out to eat. I have learned a lot about cooking and baking with these restrictions, and I am here to show you that you can make some delicious food without what America has deemed “necessary” to bake/cook with.
A little about myself: I switched to eating an organic based diet about two years ago. This switch, as well as some other things mentioned below has helped with a massive weight loss of 50 pounds. I have added being gluten-free and dairy-free (99% of the time) to my list of things to avoid. About a year ago, I did a self-experiment with gluten. I ate a sandwich, got awfully sick, bloated, and uncomfortable, so I didn’t eat any form of gluten for two weeks. Then, I ate another sandwich (same kind of bread and fixings) and realized all the things I felt before were back. I got rid of it from my diet and have felt so much better—energy has increased, I don’t have pain in my intestines, and so much more. I do indulge in an organic tortilla from time to time, but I mostly say no to gluten. When it came to dairy, it was easy. I have always had sensitivity to dairy, even when I was a little, and so it was easy to get rid of it completely. I do eat aged cheese (aged cheese after a year no longer has lactose in it, and is safe to eat for those who suffer from lactose intolerance. But, like anything, moderation is key, as I still get sick if I eat too much of it). I can’t say that I am 100% vegan, since I do eat eggs, but all my baking, unless for a customer who doesn’t have dietary restrictions are all vegan. There are a lot of vegan and gluten-free alternatives these days, and I have experimented with a lot of different brands, and have come to find a good alternatives, and some pretty not so good ones.
My gluten-free flour is a mix of three different alternatives: brown rice flour, tapioca starch, and potato flour. This combination is the perfect combination. It doesn’t taste like gluten-free flour, and I have used it in exchange of normal all-purpose flour, and I have yet to experience anything dramatic from it. Those who don’t have a sensitivity to gluten will eat my baked treats and cannot even tell it’s gluten-free and vegan. If people who don’t have sensitivities to gluten and dairy really enjoy my treats, and can’t even tell… I know I’ve done a great job!
My partner and I are in this lifestyle together. While he doesn’t have sensitivities like I do, he has noticed a difference in his energy since making the switch to gluten-free and dairy-free.  We also participate in juicing regularly, eating vegetarian, and just being healthy. We do indulge in sweets, but at least we know they are good sweets—nothing fake, no chemicals, all organic, and all delicious.
Welcome to my kitchen. Please make yourself at home, take off your shoes, and enjoy. I hope you like what you see.
Xx
Kyrie