I realize that I don't actually have a post dedicated to my flour mixture, and when I say "2.5 cups of gluten-free flour" people are getting confused, so I decided to dedicate a post specific to the flour, in hopes that I will remember to link this recipe to all the times I say "gluten-free flour."
I don't have any pictures of this lovely mixture, but it is what I use in all my baking and cooking items, unless noted in the specific blog post.
So, forgive me that I have been so careless as to not have a gluten-free flour post. :)
Kyrie's Gluten-Free Flour Mix
Makes 5 cups
4 c. superfine brown rice flour
1 1/3 c. potato starch (not potato flour)
2/3 c. tapioca flour (also known as tapioca starch)
Measure flour using a large spoon and scooping into the measuring cup, then level with back of knife. Do NOT use the measuring cup itself to scoop flour--this will compact flour and will end up with too much.
Combine all ingredients in a gallon-size ziplock bag. Shake until well blended. Store in the fridge until you're ready to use it.
I don't think it ever gets old or goes bad... I have had some flour in there for about a month and it's been fine! Also, remember to keep your potato starch and tapioca flour in the fridge once opened. Or you could make as many batches as you can to rid yourself the extra clutter from your fridge. If I know I am going to be baking a lot, I tend to make two batches of this in one ziplock, and it works great!
Wednesday, April 24, 2013

Tuesday, April 16, 2013
Quadruple Coconut Muffins


Of course I don't just use coconut on the outside of my body, I also consume it. Regularly. Whether it's making coconut muffins, coconut bread, or putting coconut flakes in my coconut milk yogurt. It's just good.


These are not sweet, and you can tell that by the amount of sugar that's in these babies. The coconut flour, coconut yogurt, the shredded coconut, the coconut oil... I think it all adds to the sweetness. It's subtle, which makes them a perfect breakfast. You can go into Starbucks and get a treat, and it is just packed with sugar. I hope you enjoy them as much as I do!

Quadruple Coconut Muffins
Yields a dozen
1/2 c. virgin coconut oil
3/4 c. gluten-free flour mix
1/2 c. coconut yogurt
1 tsp. xanthan gum
1 1/2 tsp. baking powder
1/4 tsp. table salt
1 c. plain coconut yogurt at room temp.
1/3 c. granulated sugar
1 large egg at room temp.
1 tsp. pure vanilla extract
1 c. sweetened (or unsweetened, your choice) shredded coconut, divided
Preheat oven to 375 degrees.
Grease muffin pan with coconut oil, or line with papers
Warm your coconut oil either in the microwave or in a small saucepan until it just barely melts.
In a medium bowl, combine the flour, baking powder, xanthan gum, and salt. Stir 2/3 cup of shredded coconut.
In a seperate bowl, whisk together the egg, sugar, coconut oil, coconut yogurt, and vanilla. Stir this into the dry ingredients until just combined. Divide the batter evenly into the muffin tins. Sprinkle top of muffins with the remaining coconut.
Bake about 20 minutes, or until a tester inserted into the middle of a muffin comes clean.
Store in an airtight container for 4-5 days. Although, they usually don't last that long in our house.
Saturday, April 13, 2013
Sauteed brussel sprouts and cabbage


I have never had brussel sprouts, and I was walking through the grocery store just staring at all the vegetables and so I grabbed ten of them. I also grabbed two small heads of cabbage because they looked kind of good. The problem with me going grocery shopping, and being bored while I am grocery shopping means I grab random food I don't really know what to do with it. And then I realized you can pretty much cook anything and make it taste good if you saute it.

The first think I learned when I started cooking so much, is that you always need to fry your onions and garlic first, because it just adds a totally different flavour. I have to say, it's kind of annoying to cook ALL the time. I am sure I would probably get annoyed with baking all the time, but this new adventure is something that will show me if I am cut out for baking a lot. I will still be working my real job, and then when I come home, I will be making gf and vegan banana flax muffins and gf and vegan snickerdoodles every day. It could be extremely tiring, but I am going to try. If it ends up being too much, I will try and work something else out so that I can still provide baked goods for them, but maybe not every single day.

Anyway, getting back to this meal, it really turned out so much better than I thought it would be. I am sure it would taste even better if things were sauteed in butter, because honestly, butter! Like Paula Dean always talks about... butter, butter, butter.

Roasting some sunflower seeds is what I did to add a little crunch to all the softness of the cabbage and brussel sprouts. I actually ended up loving the brussel sprouts just on their own--I don't know why so many people hate them! I think I enjoyed them so much.


Sauteed Brussel Sprouts and Cabbage
10 brussel sprouts
2 small heads of cabbage
1.5 c. roasted sunflower seeds
1 onion
6 cloves of garlic
Salt and pepper to taste
Olive oil to coat pan
Wash all the brussel sprouts and the cabbage. Cut the brussel sprouts in half and shred the cabbage like would cole-slaw. Cut the onions in half and slice the six cloves of garlic.
Heat the oil in a skillet. Once heated, toss in onions and garlic. saute for 10 minutes until things get a little crisp. Add the brussel sprouts and cabbage. Cover with a lid and let cook for 15 minutes.
Once the cabbage has shrunk in size, toss the ingredients in the pan, and cover for a another 15 minutes.
Meanwhile, take the sunflower seeds and put them on a baking sheet and put in the oven at 350 degrees until they start to brown, about 10 minutes.
Once the sunflower seeds are done, toss them into the brussel sprouts and cabbage.
Toss them altogether in the pan.
Put in a bowl, grab some chopsticks, and enjoy!
Wednesday, April 3, 2013
White bean and Kale stew
I do a lot more baking than I do cooking. Or rather, I am more excited to bake than to cook. As you can tell from most of my posts, I am a baker at heart, and it's what I do for comfort and enjoyment. I am in the process of figuring out, or rather, trying to get the courage, to make a bakery happen here in Flagstaff. An all organic bakery that specializes in gluten-free, dairy-free, and vegan baked goods. As well as baking up some treats that have all those things in them. Although, I am 100% positive that most people who would try my stuff would not even be able to tell that the desserts/baked treats they are consuming are gluten-free and vegan. I really am THAT good. You may think I am just being overly confident, but I don't know many people who have a strict diet like I do, and I tend to always bring baked goods to get togethers, and no one ever notices that the baked good they are eating, is free from all the things I am allergic too. It's pretty funny to see people's reactions when they ask me what's in it and the first thing I tell them are the things that ARE NOT in it. It makes me very happy and proud that I can create items that people enjoy.
I also believe in the importance of buying things local and organic. With the new Monsanto Act just signed (Why, America? Why?), it is even more important to pay attention to what we are consuming. There are a lot of studies out there that shows GMO's to be extremely harmful to all animals (they do testing on mice and rats, and it's just so sad to see what happens to them). We don't buy any GMO foods (how do you do this, you ask? You do the most obvious thing... you look on the package of an item for "no-gmo"). It really is quite easy. It's better for the environment, and it is better for us. There is much literature about the importance of an organic based diet, as well as supporting your local farmers. The produce is so much better when you get it local. And if you're lucky enough like me and my partner, you can plant a huge garden right in your back yard with all organic seed. If you don't have a huge yard, you can always plant lettuce in planters (you can fit a good 4-6 head of lettuce in a pot). There are ways to incorporate healthy food in your diet without pay a fortune. And growing your own foods is one of the best feelings in the world. It's nice to be working out in the backyard and picking a tomato or a pepper off the vine and biting into it while you're working.
Enough on that rant. I didn't take any pictures of this dish because it was so ridiculously easy and I needed to hurry out the door, but it is delicious. It's done in a crock pot, left to cook all day long, so when you come home after a long day at work, your house smells like someone has been cooking all day. There is something about crock pot cooking that makes me happy. I know I am using good ingredients, and only doing a little bit of work to make something so delicious. And there's left overs. :)
White bean and kale stew
6 servings
1 tsp. olive oil
1 onion, chopped
2-4 garlic cloves, minced (I like things super garlic-y. if you don't, stick with 2)
Salt and pepper to taste
1 tbs. balsamic vinegar
4 c. washed and chopped kale
1 tsp. dried oregano
5 c. water
2 15 oz. cans of white beans, unless you're patient like me and have some soaked overnight
2 tsp corriander
Either the night before, or the morning of, heat oil in a skillet and saute the onions until translucent. Add garlic, salt, and pepper, and cook for about another minute or two. Add the balsamic vinegar and stir to combine. If cooking the night before, store in a container in the fridge. If preparing the morning off, add to crock pot.
Add rest of ingredients except kale to the crock pot. Cook on low for 6-8 hours. About 30 minutes before you're going to serve, add the chopped kale. Cook for another 30 minutes, taste, and adjust seasonings to your liking before you're ready to serve.
I also believe in the importance of buying things local and organic. With the new Monsanto Act just signed (Why, America? Why?), it is even more important to pay attention to what we are consuming. There are a lot of studies out there that shows GMO's to be extremely harmful to all animals (they do testing on mice and rats, and it's just so sad to see what happens to them). We don't buy any GMO foods (how do you do this, you ask? You do the most obvious thing... you look on the package of an item for "no-gmo"). It really is quite easy. It's better for the environment, and it is better for us. There is much literature about the importance of an organic based diet, as well as supporting your local farmers. The produce is so much better when you get it local. And if you're lucky enough like me and my partner, you can plant a huge garden right in your back yard with all organic seed. If you don't have a huge yard, you can always plant lettuce in planters (you can fit a good 4-6 head of lettuce in a pot). There are ways to incorporate healthy food in your diet without pay a fortune. And growing your own foods is one of the best feelings in the world. It's nice to be working out in the backyard and picking a tomato or a pepper off the vine and biting into it while you're working.
Enough on that rant. I didn't take any pictures of this dish because it was so ridiculously easy and I needed to hurry out the door, but it is delicious. It's done in a crock pot, left to cook all day long, so when you come home after a long day at work, your house smells like someone has been cooking all day. There is something about crock pot cooking that makes me happy. I know I am using good ingredients, and only doing a little bit of work to make something so delicious. And there's left overs. :)
White bean and kale stew
6 servings
1 tsp. olive oil
1 onion, chopped
2-4 garlic cloves, minced (I like things super garlic-y. if you don't, stick with 2)
Salt and pepper to taste
1 tbs. balsamic vinegar
4 c. washed and chopped kale
1 tsp. dried oregano
5 c. water
2 15 oz. cans of white beans, unless you're patient like me and have some soaked overnight
2 tsp corriander
Either the night before, or the morning of, heat oil in a skillet and saute the onions until translucent. Add garlic, salt, and pepper, and cook for about another minute or two. Add the balsamic vinegar and stir to combine. If cooking the night before, store in a container in the fridge. If preparing the morning off, add to crock pot.
Add rest of ingredients except kale to the crock pot. Cook on low for 6-8 hours. About 30 minutes before you're going to serve, add the chopped kale. Cook for another 30 minutes, taste, and adjust seasonings to your liking before you're ready to serve.
Sunday, March 31, 2013
Vegan date bars


So I gave them a break for a while. I was thinking about what I could do with dates. They are extremely healthy for you, and they are sweet enough to be a dessert, so of course I was thinking about all the ways you could incorporate dates into a dessert. A lot of Paelo and Raw recipes use dates as a binding factor for things like crackers or pie crusts... I didn't want the date to be something that holds another something together. I wanted the date to be on display. The highlight of the dessert I was making.

Eventually something came to me. I am a sucker for dessert bars. There is something so delicate but not formal about them. I make a lot of fresh peach or nectarine bars when the fruit comes back into season because I like the way the crust and fruit just go together. And that’s when it hit me… I will make date bars!

The way the water and dates work together to make a caramel-like sauce is amazing. I like that the dates don’t actually disappear, that there are obvious chunks of them in the bar, but that they are smoother and silkier being boiled down. Add a touch of vanilla, and they really are like caramel.
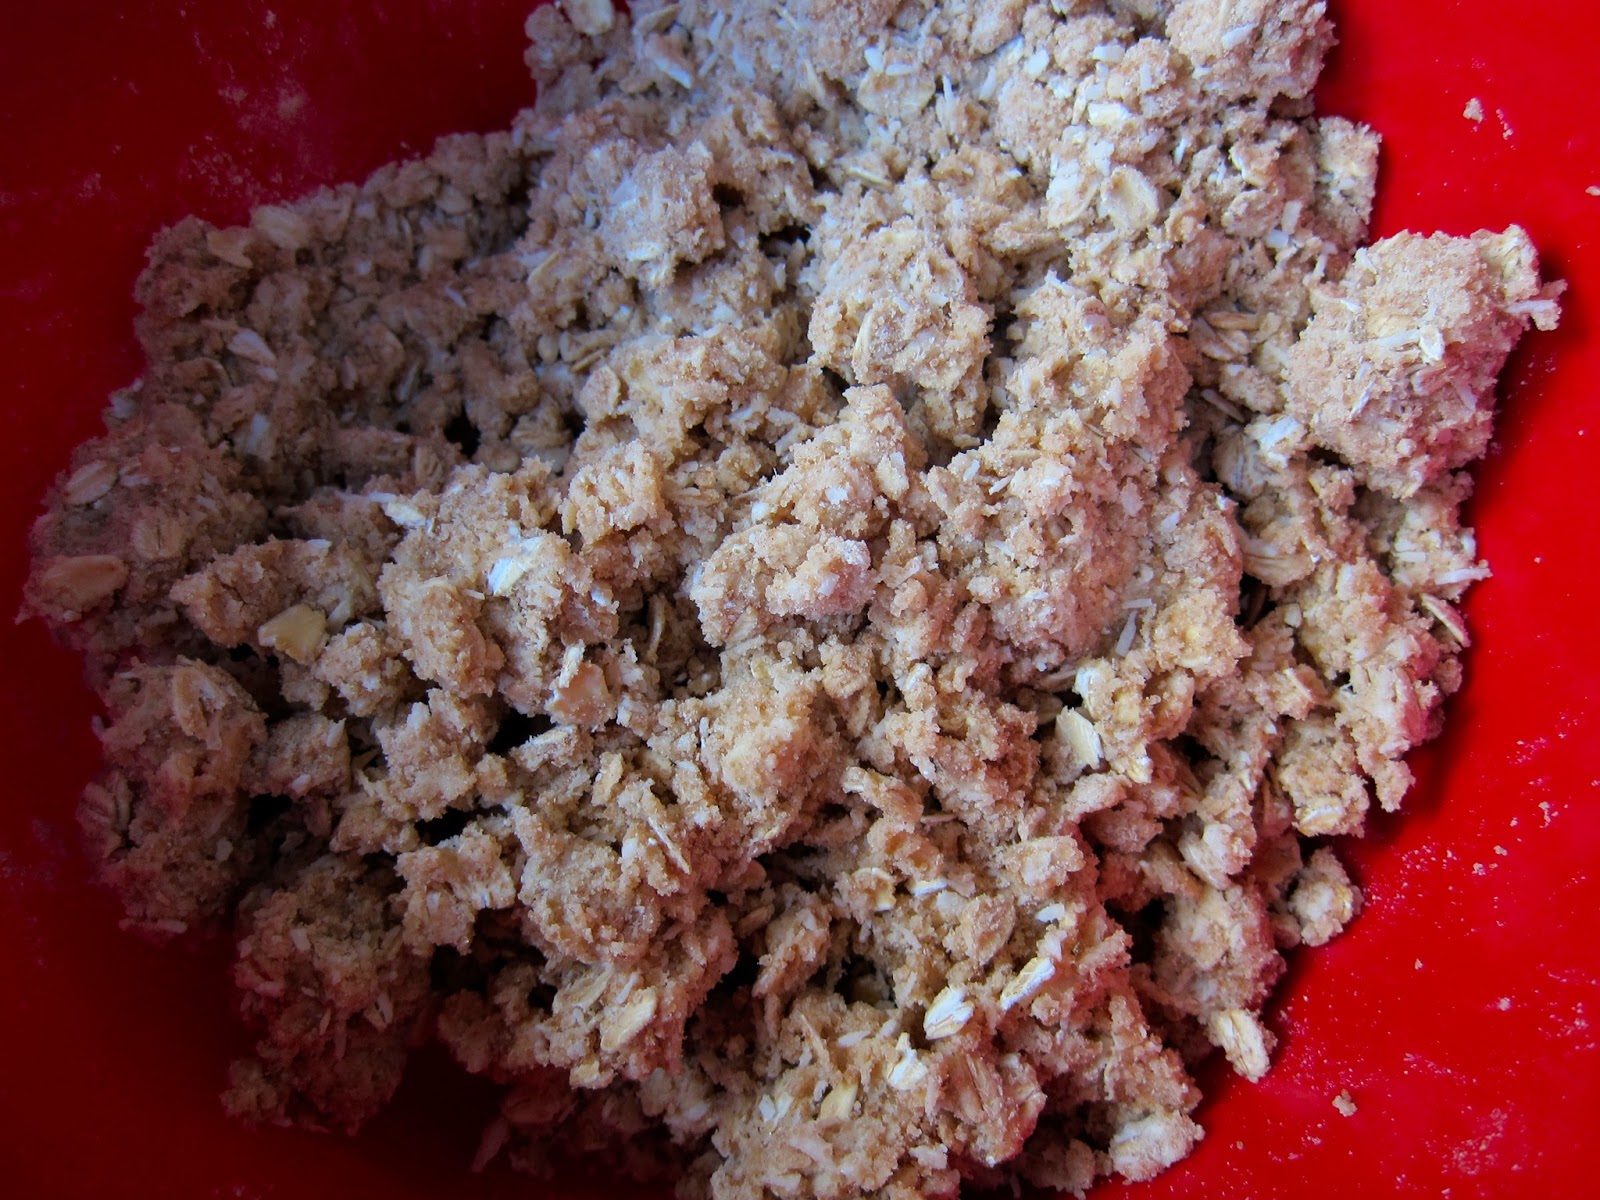
They are extremely easy to make, but do take a while since you have to wait for the date mixture to cool down before putting it on top of the crumb mixture. I tend to stick mine in the freezer to hurry up the process.

Vegan Date Bars
16 bars
2 c. pitted Medjool dates, chopped
1.5 c. water
1 tsp. vanilla
1 c. packed brown sugar
1 c. gluten-free old fashioned oats
3/4 c. coconut flour
3/4 c. brown rice flour
3/4 c. (1 and 1/2 stick) Earth Balance butter, room temperature and cubed
1 c. shredded coconut (optional)
1 tsp. baking soda
Heat oven to 350 degrees F.
In saucepan, combine dates and water, bringing to a boil over high heat. Reduce heat and simmer, uncovered and stirring occasionally for 10-20 minutes, or until dates are soft and mixture is thick. Add the vanilla, stir, and let cool to room temperature (to expedite the process, you can place in the freezer for about an hour).
While dates are cooling, in a large bowl, add the rest of the dry ingredients. Mix well before adding the butter. With hands, or a pastry blender, mix in the butter until it forms into a dough.
Oil a 9x9 square bake ware and press half the dough mixture firmly in the bottom (If you like more crust, and less topping, add a little more to the bottom). Spread date mixture over the bottom of crumb mixture, and place the remaining crumb mixture on top of the date mixture. I like to pack it down and make sure everything is firm.
Bake in over for 40-45 minutes, or until the top starts turning brown. These are delicious fresh out of the oven or with your coffee/tea the next morning. I took these to my book club meeting this past week, and they were a hit!
Keep covered for a week.
Tuesday, March 26, 2013
Coconut Tapioca Pudding


This is a pretty quick cook, besides the fact that you soak the tapioca in milk overnight, but that's pretty easy to do! You easily forget about it. And, it does take about 4 hours for the pudding to set up (I always place it in the freezer for an hour ot two so I can eat it sooner). It's a pretty easy recipe that can be tweeked or left alone.

This tapioca reminds me of those days spent at my grandma's house. But ten time better. It's a great treat to bring to parties (I think we all have memories of tapioca pudding) that will spark happiness. The texture is so creamy, and the coconut flakes add a little roughness to the creaminess. It's such a good mix. I can't explain how good this is, and with such simple ingredients (I forgot to picture the cornstarch), it's a simple dessert that lasts quite awhile.

Coconut Tapioca Pudding
Serves 6, generously
2 cups oat milk (or any other form of non-dairy milk except coconut milk (I use less of this milk, so I can add the whole can of coconut milk))
1/3 c. tapioca pearls
1 c. coconut milk
1/4 c. agave syrup
1 tsp. vanilla
1 tsp. cornstarch with 1 tbs. water mixed in (you can also use arrowroot if you don't have any cornstarch on hand)
1/4 tsp. salt
1/2 to 3/4 c. shredded coconut (optional)*
In a large pot, soak the tapioca overnight with 1 cup of the oat milk. The tapioca will fluffy up and get big, much like beans. If you notice the liquid being all soaked up, add a dash more until you're ready to cook.
When you're ready to cook, add the other cup of milk and warm the mixture over medium heat. Wait until the pudding is boiling, and then add coconut milk, agave, and vanilla. Cook for another 10 minutes, stirring constantly. The way you can tell it is ready is when all the tapioca pearls become translucent and lose their white colouring.
Add the cornstartch-water mixture and salt, cooking and stirring for an additional 5 minutes. Add the shredded coconut, mix thoroughly, and place in a glass or ceramic bowl (no plastic, as the heat will make the toxins from the plastic leak into your pudding). Place in the freezer (or fridge if you can wait 6 hours) for an hour or two, until set and no longer hot.
Serve and enjoy! It is a little on the rich size, so I tend to only eat a couple bites to get my sweet-tooth craving under control. Keep in a covered container for 5 days, if it lasts that long.
*This would be really good with sliced almonds, or maybe some dried craneberries! Or maybe some spice like cinnamon! I encourage you to experiment. I just always do coconut cause I know it's so good!
Friday, March 22, 2013
Romaine Pesto Stuffed Tomatoes

I love experimenting with different foods. I tend to find a recipe and change it about 50% to make it my own. I think that's the way you learn to cook, you find a base, and you change it all if you can. You add what you want, take out things you don't and just find what works for you. The one thing that was interesting about this meal is that it involved tomatoes. I don't really like store bought tomatoes. I refuse to eat them most of the year, until we can grow and harvest are own. The ones from our backyard are just way too good and I miss them. But, I decided to give this recipe a chance and take the plunge and buy tomatoes.

I am growing some romaine lettuce now, but they are still in the dirt, growing and waiting to make their appearance, so I had to buy a head of romaine, even though I only used about 6 leaves. I will make a salad with the rest of it this week for lunch. We grew a ton of different greens last year: three types of lettuce (each with three plants per type), collards, kale, chard. Our garden was flourishing and so delicious. The basil to the right of the lettuce in the picture above is still growing in our sun room, and it smells so good!

I don't really like pesto all that much. I think it's just too much basil. So I decided to try a romain pesto. It's essentially the same thing, but so much better. I added a little bit of cheese to it to add a little punch, and boy howdy, did it make a difference. With 5 cloves of garlic, I am sure that helped too. But honestly, I will never make normal pesto again. This will be used in pastas from now on!

We were doing spring cleaning Saturday, since my partner was suffering from an allergy attack from the juniper pollen. Because we were spring cleaning, I wanted to eat spring based foods! Tomatoes are finally looking some-what appealing, the chickens are laying eggs (or at least, my boss's chickens are laying eggs, which he is graciously giving us some), and pesto just reminds me of spring. I don't really remember what type of tomatoes I bought, but they needed to be bigger and rounder than romas. These were the only ones I could find at our health food store, and they did the trick. Although, I would recommend buying bigger ones, since the egg did spill over.

This was a great, easy, and healthy meal to make. I ended up making six last minute, but I still have left over pesto. I am sure if you only want to make 4, you could use 4 pieces of lettuce and it will do you just fine.
Romaine Pesto Stuffed Tomatoes
6 large rounded tomatoes (3-4 inches in diameter)
6 leaves of romaine lettuce
5 cloves of garlic
4-5 leaves of fresh basil
1/4 c. cheese, if using
1/4 c. extra virgin olive oil
6 eggs at room temperature
Salt and Pepper to taste
Preheat oven to 400 degrees.
Clean tomatoes, lettuce, and basil well, and pat dry. Rip romaine lettuce in 2-3 inch pieces.
In a food processor, finely chop the garlic. Add romaine lettuce and basil to food processor. Once everything is evenly cut, add cheese. Give it a quick pulse until it's mixed in, and with the motor still running, slowing add the oil. Do a little taste test and add some salt and pepper. Set aside.
Cut the tomato tops about 1/8 inch from top, and cut a little bit from the bottom so the tomato stands up straight without slipping around. Carefully scrape out the pulp and seeds with a spoon and discard them. Put the tomatoes in an oiled 8x8 backing dish, cut side up.
Take about 1 tablespoon of the romaine pesto and place inside the tomatoes. Once all tomatoes are filled, crack an egg into each tomato and season with salt and pepper. Bake eggs in tomatoes until the whites are set and yolks are still runny*. About 20 minutes.
*I over cooked some of the eggs yolks, and some not so much. I think the bigger tomatoes will help evenly distribute the egg whites a bit more. Since these were quite small, it took awhile for the eggs whites to set, which in turn, over cooked the yolk. The wider the tomatoes, the better!
Subscribe to:
Posts (Atom)