Showing posts with label gluten-free. Show all posts

Monday, November 17, 2014

Gluten-free baked oatmeal

Let me tell you about my new favourite breakfast. It's delicious, easy to make, has lots of fruits, and is a nice warm comfort food as the days are getting colder and shorter. We had this two times this weekend because it's just really delicious, and I wanted to share with you all this recipe. Meet my gluten-free baked oatmeal:
fresh out of the oven, gluten-free baked oatmeal.
I know it doesn't necessarily look pretty or sexy or anything like that, but sometimes, things are delicious and moist and so unforgettable that a picture just doesn't do it justice. I did try to make it look somewhat presentable, but the thing with baked items that are in a dish, it just doesn't turn out the way you want it to. 
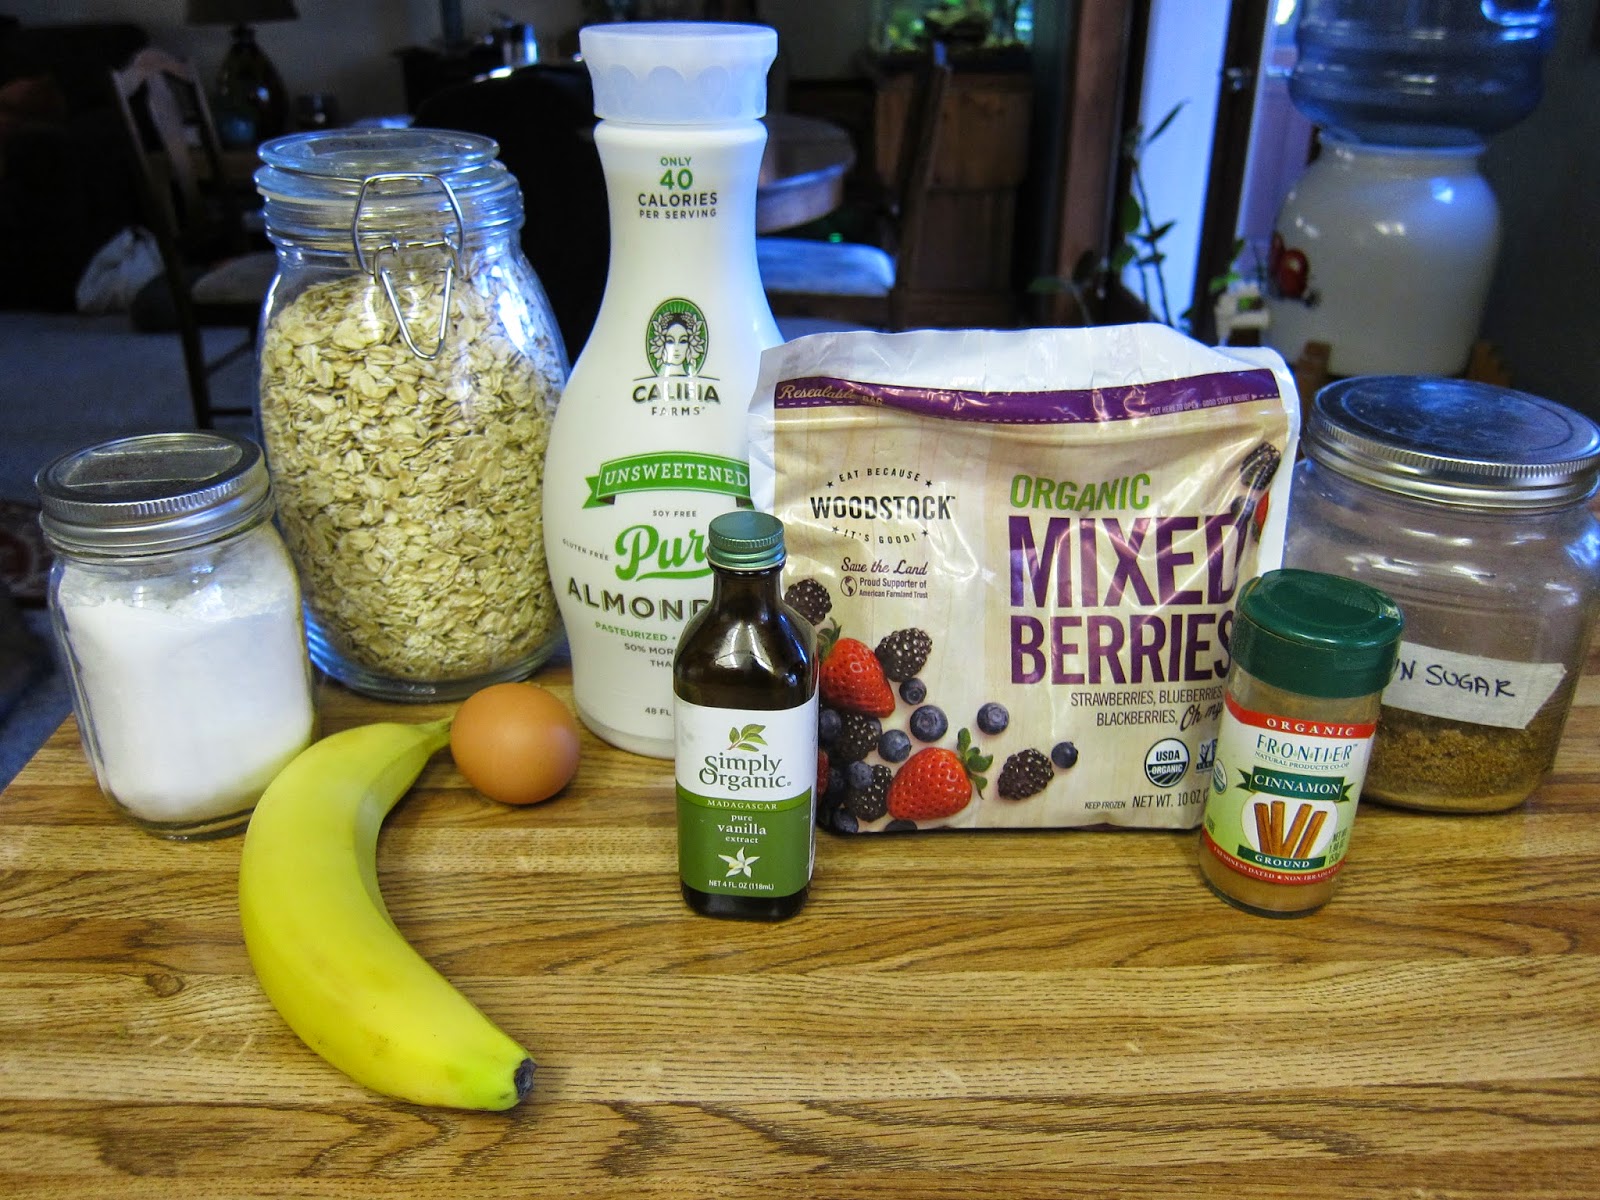
These are all the main ingredients you need! Amazing!
Life has been a little intense for me this year, so I apologize for the lack of posts. I hope to start doing some more soon since I've been experimenting with dishes lately. This dish in particular requires so few ingredients, it doesn't take me more than 10 minutes to whip this dish up. All the ingredients that you need are in this picture above. Look at that. You can even eliminate the banana if you'd like, making it only be 8 ingredients. When was the last time you did baking and only needed 8 ingredients?

All the dry ingredients.
What's nice about this dish is that I choose to only use one bowl. You put the dry ingredients first and mix them up, and then once that's done and you've added the dry ingredients to the baking dish, you can use the same bowl for the wet ingredients. It lessens the amount of dishes to clean, and it is also just easy. I am all about easy recipes these days, especially with the cold weather--I tend to want to hybernate and do less now that it's winter time.
dry ingredients on the bottom and topped with frozen fruit
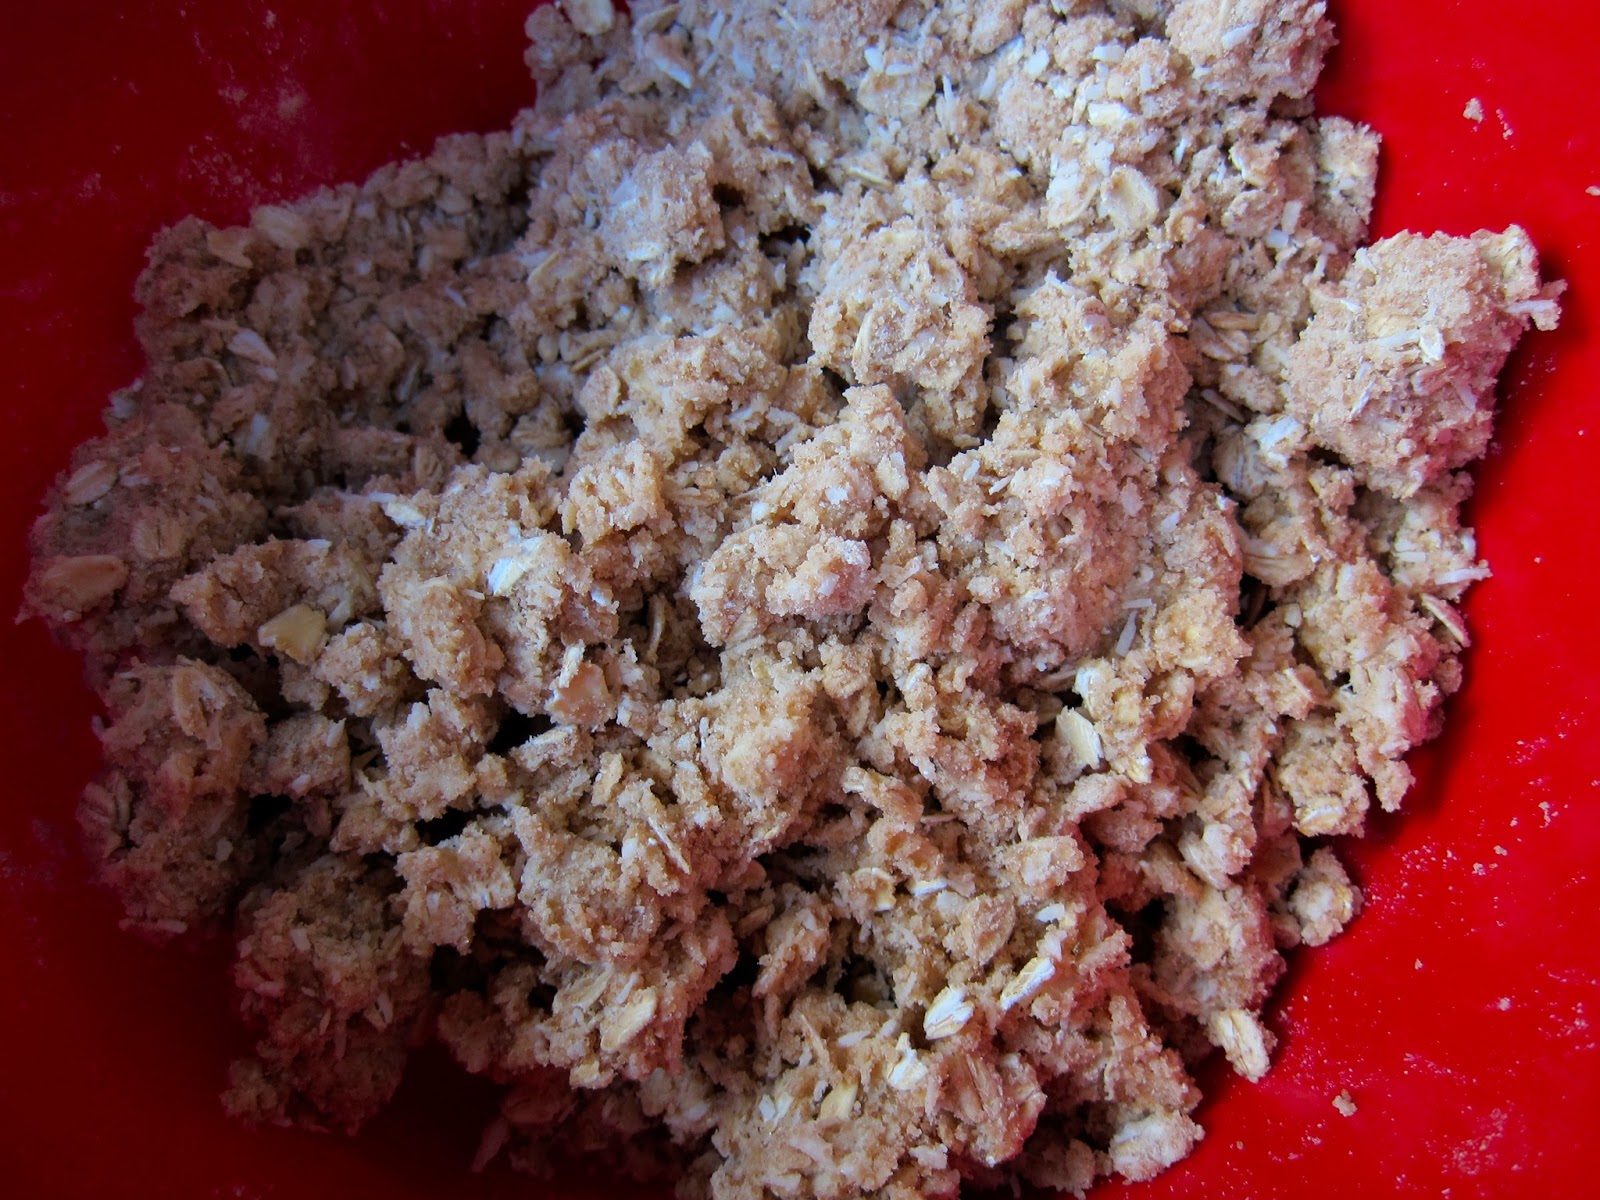
Berries are not really in season, and even if they were, I would still use frozen berries for this dish. Because they are hard, it allows for the (kind of) long cook time without them exploding or burning. Of course when you cook berries, you for sure want there to be some juicy explosions, but I also enjoy seeing the actual fruit and being able to bite into it, instead of it all being just a jellied mess. 
Wet ingredients all whisked together
I added butter to mine, to add a bit of a richer, creamy flavour. You can add vegan butter if you can't eat real butter, or you could not use any at all, and get the same delicious results. The first time I made this was for a mindful meditation brunch, and we had a lot of people who were lactose intolerant, so I opted to not use any sort of butter or butter replacement and it was all gobbled up.
The final step: pouring wet ingredients onto dry
Besides that this dish is ridiculously delicious, I like how it all comes together and is very changeable. You could add any sort of fruit you want, you can add coconut, dry fruit, nuts, use different types of milk, add chocolate... the options are endless to add twists to this recipe. My partner and I have been enjoying it the same way since I made it the first time (with the addition of butter), and I actually prefer to not have the banana, so I will probably not use bananas unless they are really ripe (we had just bought some bananas and they still had some green on them, and I personally like my bananas to be a bit ripe).
Fresh out of the oven
It isn't the most photogenic thing I've ever made, but don't let that stop you. As I've been baking and cooking, some of the best recipes I've made have looked quite... questionable. However, I also try to have a good attitude and that lovin' feeling when I make food--I think it helps. I think people can taste a difference in food when you know it's being cooked with a good attitude and good feelings. I have also learned that when I am in a bitter mood, my food usually is of lesser quality.
A quick show before it's all consumed.
This will most likely become a weekend regular at my house It does take about 40 minutes to bake, but the aroma that comes from the oven while this is baking is heavenly. This is a great dish to have for brunch or to just have. I've been finding real comfort in oatmeal lately (having it for breakfast every day with raisins, butter, and a wee bit of maple syrup), and this is a nice way to shake up my oatmeal breakfast after eating it the same way for 5 days.  I hope you enjoy this as much as we do in my house!

Ingredients:
2 c. Gluten-free oats
.5 c. Brown sugar
1 tbs. cinnamon
1 tsp. baking powder
1/4 tsp. salt
2 c. Milk of your choosing
1 egg
1 tbs. vanilla extract
3 tbs. butter, melted (or vegan butter)
1 package frozen fruit (I used mixed berry for variety)
1 banana (optional)

Preheat oven to 375. Spray or oil a baking dish. I used both a 9x12 and a 9x7 and I prefer the smaller one--makes the food thicker and not so thin and spread out. It also bakes a bit better.

In a medium mixing bowl, add oats, brown sugar, cinnamon, baking powder, and salt. Whisk thoroughly. Add this mixture to your prepared pan.

In the same bowl (I am all about using as few dishes as possible), mix together the milk, egg, vanilla, and butter. Make sure to whisk this really well to get the egg nicely incorporated into the mixture.

Put the frozen fruit on top of the oat mixture in pan, and slice the banana if using and add to this mix.

Pour the wet ingredients over the oats in an evenly fashion to make sure everything is nicely coated. Let it sit for about 30 seconds to let the wet ingredients seep into the oats.

Bake for 40 minutes and enjoy! This is a huge hit and doesn't last long.


Tuesday, July 23, 2013

Puffed Millet Peanut Butter Balls

Finished product. One with chocolate, one without. Both delicious.
These guys are freaking delicious. There are no words to really describe how awesome these are. They taste exactly like a Reese's Peanut Butter Cup, but without all the crap. With only 5 ingredients, they are really quick to whip up and enjoy within 20 minutes of starting. It's awesome. 
 
Puffed Millet
Peanut Butterrrrr


I made these because we were headed to Phoenix for awhile so that my partner could get costume fitted, as well as learn some choreography for a movie. Yes, a movie! He will be fencing in a movie that a woman is putting on for film school. Since we follow a pretty strict diet, and we were unsure how long we were going to be in Phoenix, I decided to make as many things that could be easily transferred and eaten on the road. These were the perfect little treats, packed full of energy with the millet and the peanut butter

yummy.

Just look at that creamy yummy texture! You do have to chill the "dough" before you try and roll it into balls, but that doesn't take long. 5-10 minutes maybe. And then you roll them up and they are ready to eat, unless you put some chocolate on them, then they need a little more chilling before you dip them. I highly recommend doing a 50/50 mix of chocolate and non-chocolate. At least the first time, and then you'll know which ones you like better.

Puffed Millet Peanut Butter Balls!

I also really enjoyed the lack of clean-up needed making these. I used one bowl (with the exception of the one used for melting chocolate), and they whipped up so fast. As a baker, I know that patience is needed to make some awesome stuff. And I suppose this isn't really "baking," but "making." It was just nice to have a homemade sweet treat so quickly and so mess free. Usually when I bake, things go flying everywhere and I get really messy.


The chocolate dipped ones remind me so much of Reeses PB cups
I really dislike rolling things out. So maybe you have a kid or a partner, or someone who enjoys making balls that are actually bite size. I start off with the best intentions of making bite-sized balls to easily pop in your mouth while driving, but I get so annoyed with rolling things out that I tend to start small and get larger each time. It's kind of like making pancakes--you start off making normal sized pancakes, and then towards the end, you make one GIANT pancake cause you're just over it. Or at least I am, and that's what I do. These balls are exactly the same way. I started off small, but then just go so bored that I made them larger than bite size. At least for me--I have a tiny mouth so it required two or three bites, but my partner just popped them in his mouth with no sweat.
 
Look at that delicious-ness!

Puffed Millet Peanut Butter Balls
Makes 20-32+ balls (depending on size)

2 c. puffed millet
1 c. peanut butter (I used half creamy and half crunchy since that's all I had)
4-6 tbs. agave (depending on how much you want them sweet)
2 tsp. vanilla extract

Chocolate coating:
Handful of dark chocolate
1tbs. coconut oil

Place peanut butter in a microwaveable measuring cup and warm for 45 seconds. Once a bit more creamy and melted, add to bowl with agave and vanilla. Mix thoroughly. Add the puffed millet and stir until millet is coated with peanut butter mixture thoroughly.

Once everything is combined well, roll into bite sized balls. Place on a baking sheet, lined with parchment paper and stick in fridge to set up. About 10 minutes.

If adding chocolate coating, take a handful of dark chocolate chips and the coconut oil and place in a microwave safe bowl. Heat for 1 minute and stir until all the chocolate chips have melted. Pick up the puffed millet peanut butter balls and dip one side in the chocolate, and place back on the parchment paper. Do this for as many chocolate ones you desire. If you want, stick in the fridge, let set up again, and then do another round of dipping of chocolate. Once completed, put in the fridge for another 5-10 minutes, then enjoy!

Keep these refridgerated since the chocolate tends to melt and things start to get mushy when they are left out. I kept mine in a zip loc bag, but feel free to use any airtight container that works best for you.

Monday, July 1, 2013

Gluten-free, vegan, peach pie and crust

The final product! Looks, smells, and tastes delicious!
Gluten-free baking is a tricky, tricky, thing. Flours taste weird, things don't rise like they do with normal all purpose flour, sometimes it is really dense, and sometimes it turns out just right, like this pie and pie crust.

millions of peaches, peaches fo me!
I have been figuring out pie crusts for almost a year. I made a ton of pies last year with fresh pumpkin from our garden, preparing for Thanksgiving and wanting it to be perfect. The pie crust I used was ok. It tasted gluten-free and I didn't really enjoy it. It was a weird consistency and it was so funky. So, I gave pie making a rest until I saw rhubarb at the store and realized I had never had rhubarb, and more specifically, a strawberry rhubarb pie before. So I was set on a mission to create the perfect pie crust for this delicious sounding pie.

dry ingredients for the pie crust. 
The first time I made the pie, I did make a strawberry rhubarb pie. The crust was a bust. I added too much liquid, which made me add more flour to try and balance it out. I ended up having a TON of pie crust, and it came out super thick. I don't really like thick crusts... I would prefer a nice little layer of crust and mostly fillings with my pies. So, while it tasted good, I ended up mostly eating just the filling of the strawberry rhubarb pie. My partner loved it and ate it all.
Finally a good gf, vegan pie crust!
The second time I made a pie, I made it with apricots and the pie crust, after paying more attention, turned out perfect. I didn't make so much and I also made it thin enough that when I held up the pie pan to the light, I could see the light through it. Not like there were holes, but the crust was thin enough that I could see that there was a light on.

peaches cooking down, releasing their delicious juices!
So, of course, I had to make another pie to make it even better. I am really into pies lately. I especially like this pie because, well, it's pretty darn healthy for you. The replacement of coconut sugar is so much better than plain ol' granulated sugar. So my project was a peach pie, because oh my goodness, the peaches look heavenly.

sweet crust drops
This pie crust isn't all that sweet, so I added a little sweet crust drops on top of the pie. This was like what you'd put on top of a crisp. But, it wasn't filled with oats. It was the perfect sweet top to add to the tart strawberry rhubarb filling.

close up of the topping on the pie before baking.
I hope you enjoy this pie crust as much as I do. It really is my new go to pie crust. And it takes minutes to put it together.

Gluten-free, Vegan Pie Crust
Serving: 1 9-inch pie dish

1 1/2 c. brown rice flour
1 tbs. arrow root
3/4 tsp. salt
1 tsp. coconut sugar
1/4 tsp. cinnamon
1/2 c. refined coconut oil, solid
1 1/2 tbs. vanilla extract
3 tbs. agave nectar
6 tbs. water

In a bowl, combine dry ingredients. With the mixer on low, gradually add in coconut oil a tablespoon at a time. Once the mix is crumbly, add in vanilla, coconut nectar and slowly add in water a tablespoon at a time until the dough all comes together and forms a ball.

Remove from bowl and form into a ball shape and flatten into a disk. Oil  bottom of pie plate, place disk into pie plate, using either the heel of your hand or pastry roller, press out into the bottom and sides of the plate; then use your hands to form crust and crimp edges. With a fork poke a few holes in the bottom of the crust. 

Preheat oven to 350°*. Place crust in freezer until it hardens up (usually about 15 minutes).

Bake for 5-6 minutes.

Pie Filling

5-6 peaches
1/4 c. coconut oil (solid)
6 tbs. coconut sugar
1 tbs. vanilla extract
2 tbs. arrowroot
1tbs. water

Place filling ingredients, excluding the arrowroot/water in a pot over medium heat, stirring frequently. After the peaches have cooked down, mixed together the arrowroot and water to form a slurry.

Pour arrowroot/water mixture into the peaches. Keep on the heat and stir until the mixture thickens (you'll be able to feel it, so keep stirring and mak sure it is evently combined and thickened.

Pour into pie crust.

Topping

1/4 c. coconut sugar
1/4 c. brown rice flour
2 tbs. coconut oil

Using a fork, mix together ingredients until they form a crumb like consistence. Place spread out on pie before baking.

Bake pie for 30 minutes. Let cool before placing in fridge. If you don't have enough patience as me, place pie in the freezer to help speed along the setting up of pie.

Enjoy at room temperature, or heated with a dollop of ice cream.

* I baked my pie in our grill (because it was 9.30 IN THE MORNING and it was already over 85 degrees in the house), which is like a conventional oven. Infrared is what they call it I think. I ended up baking it about 10 minutes shorter than I would have in the oven because it started to boil it over. So I just transfered it to the oven in the house and let it heat up the oven and continue to bake for the remainder minutes. I have to admit that I was a little nervous that it would taste like chicken since that's what we grill, but it doesn't. It tastes like peach pie and it is freakin' delicious. 

The oven for the pie. aka. the grill!
Pie siting on the grill


Tuesday, June 11, 2013

Ginger Snaps


It's been awhile, I know. I could give you all my excuses, sure, but I don't want to. Instead, I will tell you I've been busy gardening and living life. Also, it has been so bloody hot in Flagstaff lately that the thought of turning on the oven is gut wrenching. We have a sunroom, right next to the kitchen, and lately that sun room has been hitting the triple digits, and the house itself is usually in the upper 80's. So, baking and cooking is something I try and keep to a minimum.


I made these cookies for my April book club meeting. Yes, I know... It's extremely nerdy to be in a book club, but I love books, and I love people who love books. And I love having a night every month where I can hang out with my friends and be nerdy. It's so much fun, and while we are still in the beginning of figuring out how these things work, I am enjoying it immensely. But yes, I have been holding this recipe for almost two months and I don't feel bad about it. And you'll forgive me as soon as you make them yourself. See that molasses colour up there? You know they are going to be delicious.


I think it is essential to always keep dry and wet ingredients separate. I don't think it's a good idea to just combine things in one bowl all at once and hope for the best. That's the thing with baking--it actually is like a chemistry--you have to measure things out perfectly, mix things properly, and keep liquids and dry ingredients separate until it is read to combine them.


These are the perfect cookies to take over to someone's house for tea. They are tender and soft right after you bake them, but they do tend to crisp up as they start really cooling down. Which is great to dip tea in! The tea moistens them all up, and then they just melt in your mouth. They were a hit at the book club get together, as well as home. My partner ate about 7 in one night, so you know they are good. I even enjoyed this one... just so I could take a picture of the texture on top and in the middle of these babies. It was pure torture. ;)


Ginger Snaps
Makes about 2 dozen cookies

1/4 c. organic vegetable shortening
1/4 c. granulated sugar, plus 2-4 tbs for rolling cookies in
2 tbs. light brown sugar
3 tbs. molasses
1/2 tsp. vanilla
1/4 tsp. xantham gum
1/4 tsp. baking soda
1/2 tsp. cream of tartar
1/8 tsp. salt
1 tsp. ground ginger
1/2 tsp. ground cinnamon
1/4 tsp. ground nutmeg

Preheat oven to 350 and line two baking sheets with parchment paper.

In a bowl of a stand-up mixer with the paddle attachment, combine the shortening and the 1/4 c. granulated sugar, mixing on medium speed until smooth and fluffy (1 min. or so). Add the brown sugar, molasses, and vanilla mixing thoroughly (2 mins. or so).

In a separate bowl, whisk together the flour mix, xanthan gum, baking soda, cream of tartar, salt, ginger, cinnamon, and nutmeg.

Add the flour mixture to the shortening mixture and beat on low to combine, scraping down sides when necessary. 

Using your hands, roll teaspoon (I did slightly larger... maybe a tablespoon) size pieces of dough into balls. 

Pour the remaining sugar in a shallow bowl and roll the balls of dough in the sugar, making sure to evenly coat each cookie. 

Bake in the center rack for about 12 minutes, until puffy and they start to crack. Let cook on sheets before transferring them to a cooling rack.

Enjoy!

Wednesday, April 24, 2013

Gluten-Free flour mixture

I realize that I don't actually have a post dedicated to my flour mixture, and when I say "2.5 cups of gluten-free flour" people are getting confused, so I decided to dedicate a post specific to the flour, in hopes that I will remember to link this recipe to all the times I say "gluten-free flour."

I don't have any pictures of this lovely mixture, but it is what I use in all my baking and cooking items, unless noted in the specific blog post.

So, forgive me that I have been so careless as to not have a gluten-free flour post. :)

Kyrie's Gluten-Free Flour Mix
Makes 5 cups

4 c. superfine brown rice flour
1 1/3 c. potato starch (not potato flour)
2/3 c. tapioca flour (also known as tapioca starch)

Measure flour using a large spoon and scooping into the measuring cup, then level with back of knife. Do NOT use the measuring cup itself to scoop flour--this will compact flour and will end up with too much.

Combine all ingredients in a gallon-size ziplock bag. Shake until well blended. Store in the fridge until you're ready to use it.

I don't think it ever gets old or goes bad... I have had some flour in there for about a month and it's been fine! Also, remember to keep your potato starch and tapioca flour in the fridge once opened. Or you could make as many batches as you can to rid yourself the extra clutter from your fridge. If I know I am going to be baking a lot, I tend to make two batches of this in one ziplock, and it works great!

Tuesday, April 16, 2013

Quadruple Coconut Muffins


I really love coconut. REALLY, REALLY, REALLY love coconut. I think it is delicious. Coconut water, coconut oil, coconut flakes, chocolate covered coconut. All of it. I have not met something I didn't like that featured coconut. So when I decided to make muffins featuring coconut, I knew I was going to use as many forms of coconut that made sense. This, of course, lead to coconut oil, coconut flour, coconut yogurt, and coconut flakes. And trust me, it's all about the coconut with these delicious babies.


There are a lot of health benefits to coconut. I drink coconut water pretty regularly, especially after a hike, before or after a massage, just because I can. It's delicious and so very hydrating. I make my own coconut oil lotion by whipping it up with my stand up mixer, and adding a few drops of essential oils (usually lavendar because the two combined smell heavenly). It's natural and healthy. Yes, it takes awhile to get used to the oily aspect of it, but I have noticed that if I put it on right after I step out of the shower and pat myself dry, my skin eats it up and there's harldy any oil on my skin. I especially use this on my face, since I don't trust any other type of face product on my deliciate little face. I also put coconut in my mouth and swish it around for about 10 minutes. This helps whiten your teeth naturally, but it also helps you feel better if you feel like you're getting sick or are sick. It pulls all the bacteria out of your mouth, and trust me, when you spit it out, you will notice the bacteria in the coconut oil. It's amazing. I also use it for burns, cuts, scratches, or anything else. Needless to say, coconut oil is my go-to everything.


Of course I don't just use coconut on the outside of my body, I also consume it. Regularly. Whether it's making coconut muffins, coconut bread, or putting coconut flakes in my coconut milk yogurt. It's just good.


These muffins are easy to transport to office meetings, brunch, or just to move from your kitchen to the table to eat. I tend to cut the muffins in half and put some vegan butter on them. These are really, really, really good with lemon curd! I don't really like cold muffins, so I always heat them up after the first day. They just taste better, so stick them in the microwave for 20 seconds. It also helps the vegan butter melt and get into the pores of the muffin. :)


These are not sweet, and you can tell that by the amount of sugar that's in these babies. The coconut flour, coconut yogurt, the shredded coconut, the coconut oil... I think it all adds to the sweetness. It's subtle, which makes them a perfect breakfast. You can go into Starbucks and get a treat, and it is just packed with sugar. I hope you enjoy them as much as I do!


Quadruple Coconut Muffins
Yields a dozen


1/2 c. virgin coconut oil
3/4 c. gluten-free flour mix
1/2 c. coconut yogurt
1 tsp. xanthan gum
1 1/2 tsp. baking powder
1/4 tsp. table salt
1 c. plain coconut yogurt at room temp.
1/3 c. granulated sugar
1 large egg at room temp.
1 tsp. pure vanilla extract
1 c. sweetened (or unsweetened, your choice) shredded coconut, divided

Preheat oven to 375 degrees.

Grease muffin pan with coconut oil, or line with papers

Warm your coconut oil either in the microwave or in a small saucepan until it just barely melts.

In a medium bowl, combine the flour, baking powder, xanthan gum, and salt. Stir 2/3 cup of shredded coconut.

In a seperate bowl, whisk together the egg, sugar, coconut oil, coconut yogurt, and vanilla. Stir this into the dry ingredients until just combined. Divide the batter evenly into the muffin tins. Sprinkle top of muffins with the remaining coconut.

Bake about 20 minutes, or until a tester inserted into the middle of a muffin comes clean.

Store in an airtight container for 4-5 days. Although, they usually don't last that long in our house.

Saturday, April 13, 2013

Sauteed brussel sprouts and cabbage


It's been awhile since I wrote a post, forgive me? Things have been crazy in my kitchen lately. What do you mean, you may ask? Ohhh, just this thing of me baking my gluten-free and vegan baked goods at a new coffee shop!


Last week, I prepared: gluten-free and vegan banana flax-seed muffins, gluten-free and vegan snickerdoodles, gluten-free and vegan pumpkin bread, and cranberry bran muffins. So, I have been busy baking, chatting with the general manager, and then working my full-time job, cooking all the time. It's been very busy. I have been very busy, so I needed a quick meal that wasn't going to take me long.


I have never had brussel sprouts, and I was walking through the grocery store just staring at all the vegetables and so I grabbed ten of them. I also grabbed two small heads of cabbage because they looked kind of good. The problem with me going grocery shopping, and being bored while I am grocery shopping means I grab random food I don't really know what to do with it. And then I realized you can pretty much cook anything and make it taste good if you saute it. 


The first think I learned when I started cooking so much, is that you always need to fry your onions and garlic first, because it just adds a totally different flavour. I have to say, it's kind of annoying to cook ALL the time. I am sure I would probably get annoyed with baking all the time, but this new adventure is something that will show me if I am cut out for baking a lot. I will still be working my real job, and then when I come home, I will be making gf and vegan banana flax muffins and gf and vegan snickerdoodles every day. It could be extremely tiring, but I am going to try. If it ends up being too much, I will try and work something else out so that I can still provide baked goods for them, but maybe not every single day. 


Anyway, getting back to this meal, it really turned out so much better than I thought it would be. I am sure it would taste even better if things were sauteed in butter, because honestly, butter! Like Paula Dean always talks about... butter, butter, butter. 


Roasting some sunflower seeds is what I did to add a little crunch to all the softness of the cabbage and brussel sprouts. I actually ended up loving the brussel sprouts just on their own--I don't know why so many people hate them! I think I enjoyed them so much. 


I had all these things sitting in the fridge for over a week, including asparagus, so I needed to cook them all. This last minute idea was pretty quick and delicious. And it was really filling. It's so nice to eat good food that makes you feel good. Even when you have a crappy day. It tends to lift you up.


Sauteed Brussel Sprouts and Cabbage
10 brussel sprouts
2 small heads of cabbage
1.5 c. roasted sunflower seeds
1 onion
6 cloves of garlic
Salt and pepper to taste
Olive oil to coat pan

Wash all the brussel sprouts and the cabbage. Cut the brussel sprouts in half and shred the cabbage like would cole-slaw. Cut the onions in half and slice the six cloves of garlic.

Heat the oil in a skillet. Once heated, toss in onions and garlic. saute for 10 minutes until things get a little crisp. Add the brussel sprouts and cabbage. Cover with a lid and let cook for 15 minutes.

Once the cabbage has shrunk in size, toss the ingredients in the pan, and cover for a another 15 minutes.

Meanwhile, take the sunflower seeds and put them on a baking sheet and put in the oven at 350 degrees until they start to brown, about 10 minutes.

Once the sunflower seeds are done, toss them into the brussel sprouts and cabbage.

Toss them altogether in the pan.

Put in a bowl, grab some chopsticks, and enjoy!

Sunday, March 31, 2013

Vegan date bars


My relationship with dates is a new one. We just met last summer, and I was a little hesitant of them. The ones I had been given were from a local farm here in Arizona, and they were sooooo sweet—like biting into a piece of caramel. They were good, but it made my teeth hurt (you know the feeling when you bite something sweet or sour and your sweet tooth does a little ache? That's what it was).


So I gave them a break for a while. I was thinking about what I could do with dates. They are extremely healthy for you, and they are sweet enough to be a dessert, so of course I was thinking about all the ways you could incorporate dates into a dessert. A lot of Paelo and Raw recipes use dates as a binding factor for things like crackers or pie crusts... I didn't want the date to be something that holds another something together. I wanted the date to be on display. The highlight of the dessert I was making.


Eventually something came to me. I am a sucker for dessert bars. There is something so delicate but not formal about them. I make a lot of fresh peach or nectarine bars when the fruit comes back into season because I like the way the crust and fruit just go together. And that’s when it hit me… I will make date bars!


The way the water and dates work together to make a caramel-like sauce is amazing. I like that the dates don’t actually disappear, that there are obvious chunks of them in the bar, but that they are smoother and silkier being boiled down. Add a touch of vanilla, and they really are like caramel.


They are extremely easy to make, but do take a while since you have to wait for the date mixture to cool down before putting it on top of the crumb mixture. I tend to stick mine in the freezer to hurry up the process.


Vegan Date Bars
16 bars

2 c. pitted Medjool dates, chopped
1.5 c. water
1 tsp. vanilla
1 c. packed brown sugar
1 c. gluten-free old fashioned oats
3/4 c. coconut flour
3/4 c. brown rice flour
3/4 c. (1 and 1/2 stick) Earth Balance butter, room temperature and cubed
1 c. shredded coconut (optional)
1 tsp. baking soda

Heat oven to 350 degrees F.

In saucepan, combine dates and water, bringing to a boil over high heat. Reduce heat and simmer, uncovered and stirring occasionally for 10-20 minutes, or until dates are soft and mixture is thick. Add the vanilla, stir, and let cool to room temperature (to expedite the process, you can place in the freezer for about an hour).
While dates are cooling, in a large bowl, add the rest of the dry ingredients. Mix well before adding the butter. With hands, or a pastry blender, mix in the butter until it forms into a dough.

Oil a 9x9 square bake ware and press half the dough mixture firmly in the bottom (If you like more crust, and less topping, add a little more to the bottom). Spread date mixture over the bottom of crumb mixture, and place the remaining crumb mixture on top of the date mixture. I like to pack it down and make sure everything is firm.

Bake in over for 40-45 minutes, or until the top starts turning brown. These are delicious fresh out of the oven or with your coffee/tea the next morning. I took these to my book club meeting this past week, and they were a hit!

Keep covered for a week.

Friday, March 22, 2013

Romaine Pesto Stuffed Tomatoes


I love experimenting with different foods. I tend to find a recipe and change it about 50% to make it my own. I think that's the way you learn to cook, you find a base, and you change it all if you can. You add what you want, take out things you don't and just find what works for you. The one thing that was interesting about this meal is that it involved tomatoes. I don't really like store bought tomatoes. I refuse to eat them most of the year, until we can grow and harvest are own. The ones from our backyard are just way too good and I miss them. But, I decided to give this recipe a chance and take the plunge and buy tomatoes. 


I am growing some romaine lettuce now, but they are still in the dirt, growing and waiting to make their appearance, so I had to buy a head of romaine, even though I only used about 6 leaves. I will make a salad with the rest of it this week for lunch. We grew a ton of different greens last year: three types of lettuce (each with three plants per type), collards, kale, chard. Our garden was flourishing and so delicious. The basil to the right of the lettuce in the picture above is still growing in our sun room, and it smells so good!


I don't really like pesto all that much. I think it's just too much basil. So I decided to try a romain pesto. It's essentially the same thing, but so much better. I added a little bit of cheese to it to add a little punch, and boy howdy, did it make a difference. With 5 cloves of garlic, I am sure that helped too. But honestly, I will never make normal pesto again. This will be used in pastas from now on!


We were doing spring cleaning Saturday, since my partner was suffering from an allergy attack from the juniper pollen. Because we were spring cleaning, I wanted to eat spring based foods! Tomatoes are finally looking some-what appealing, the chickens are laying eggs (or at least, my boss's chickens are laying eggs, which he is graciously giving us some), and pesto just reminds me of spring. I don't really remember what type of tomatoes I bought, but they needed to be bigger and rounder than romas. These were the only ones I could find at our health food store, and they did the trick. Although, I would recommend buying bigger ones, since the egg did spill over. 


This was a great, easy, and healthy meal to make. I ended up making six last minute, but I still have left over pesto. I am sure if you only want to make 4, you could use 4 pieces of lettuce and it will do you just fine.

Romaine Pesto Stuffed Tomatoes

6 large rounded tomatoes (3-4 inches in diameter)
6 leaves of romaine lettuce
5 cloves of garlic
4-5 leaves of fresh basil
1/4 c. cheese, if using
1/4 c. extra virgin olive oil
6 eggs at room temperature
Salt and Pepper to taste

Preheat oven to 400 degrees.

Clean tomatoes, lettuce, and basil well, and pat dry. Rip romaine lettuce in 2-3 inch pieces. 

In a food processor, finely chop the garlic. Add romaine lettuce and basil to food processor. Once everything is evenly cut, add cheese. Give it a quick pulse until it's mixed in, and with the motor still running, slowing add the oil. Do a little taste test and add some salt and pepper. Set aside.

Cut the tomato tops about 1/8 inch from top, and cut a little bit from the bottom so the tomato stands up straight without slipping around. Carefully scrape out the pulp and seeds with a spoon and discard them. Put the tomatoes in an oiled 8x8 backing dish, cut side up. 

Take about 1 tablespoon of the romaine pesto and place inside the tomatoes. Once all tomatoes are filled, crack an egg into each tomato and season with salt and pepper. Bake eggs in tomatoes until the whites are set and yolks are still runny*. About 20 minutes.

*I over cooked some of the eggs yolks, and some not so much. I think the bigger tomatoes will help evenly distribute the egg whites a bit more. Since these were quite small, it took awhile for the eggs whites to set, which in turn, over cooked the yolk. The wider the tomatoes, the better!